A connection is a saved set of details JiveDB uses to reach one database: its type, address, and login. This chapter explains how to create, edit, and organize connections, including secure options like TLS/SSL and an SSH tunnel.
Contents
1. Supported database types
When you create a connection, you choose one Database type:
- PostgreSQL (default port
5432) - MySQL (default port
3306) - MariaDB (default port
3306) - SQLite — a local file, so it has no host/port. Instead you pick a File path on your computer.
- Redis (default port
6379)
2. Create a new connection
- Click New connection in the toolbar, or click the + icon at the top of the sidebar's Connections panel.
- In the connection dialog, stay on the first tab, Connection.
- Fill in the fields:
- Connection name — any label you choose (for example, "Local Postgres").
- Group — optional. Type a name to file this connection under a folder in the sidebar. Leave it empty to keep the connection outside any folder.
- Database type — pick PostgreSQL, MySQL, MariaDB, SQLite, or Redis.
- Host and Port — the server address. Port has up/down stepper arrows and a sensible default per database type.
- Username and Password — your login credentials.
- Database (optional) — the specific database/schema to open by default.
- Click Test to check that JiveDB can reach the server with these details, before saving.
- Click Save.
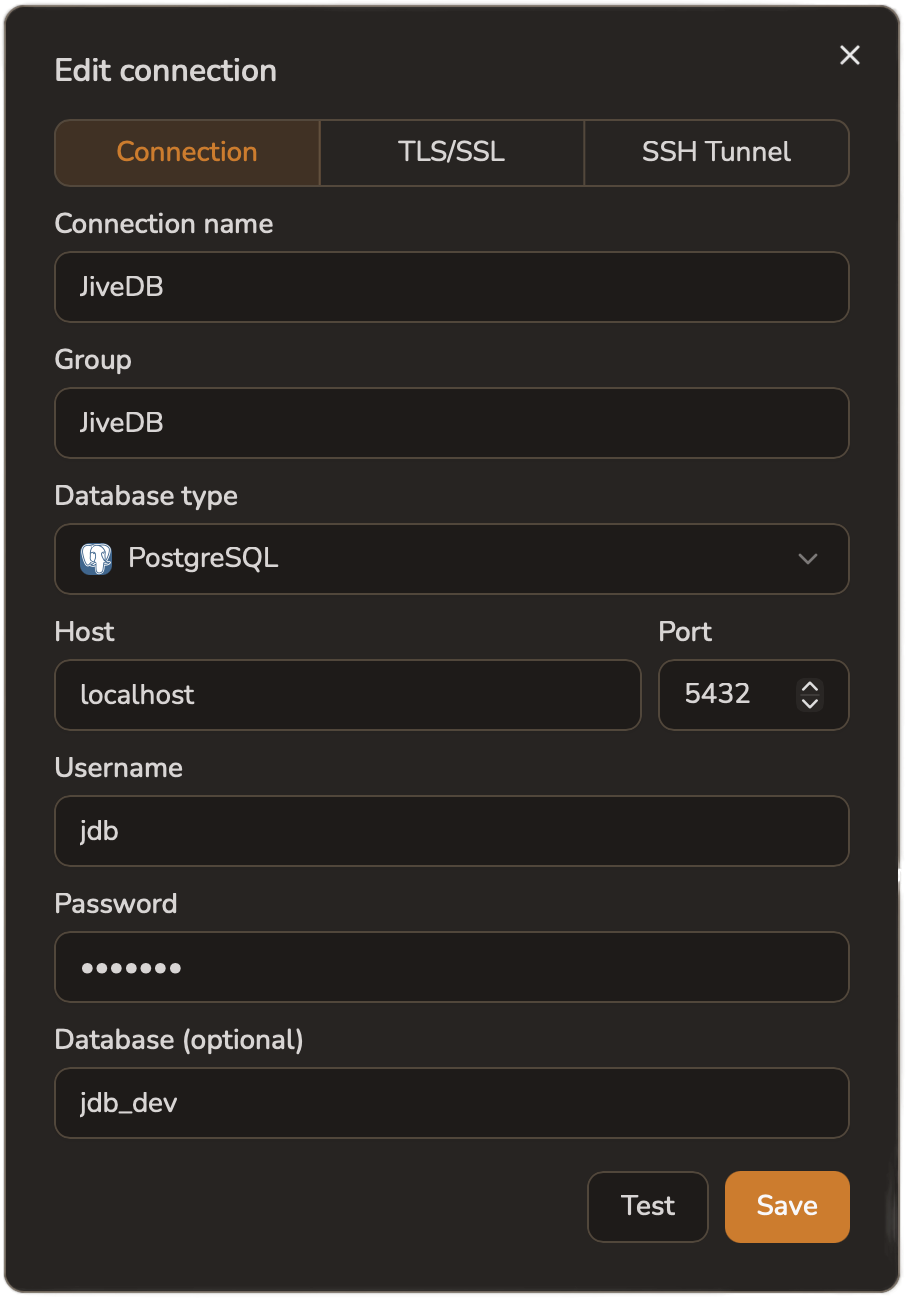
Once saved, the connection appears in the sidebar tree, with an icon that matches its database type (for example, an elephant icon for PostgreSQL).
3. Secure a connection with TLS/SSL
If your database server requires an encrypted connection, switch to the TLS/SSL tab in the connection dialog:
- Open the connection dialog (new or existing connection) and click the TLS/SSL tab.
- Choose a TLS Mode:
- Disable — no encryption.
- Require (encrypt only) — encrypts the connection but does not check the server's identity.
- Verify CA — encrypts and checks that the server certificate was signed by a trusted authority.
- Verify Full — the strongest option: encrypts, checks the certificate authority, and also checks that the hostname matches the certificate.
- If you chose Verify CA or Verify Full, fill in:
- Server CA — the path to your CA certificate file, or browse for it with the folder icon.
- If your server also requires mutual TLS (mTLS), fill in Client Auth:
- A client certificate file and a client private key file. Both must be provided together.
- Click Test, then Save.
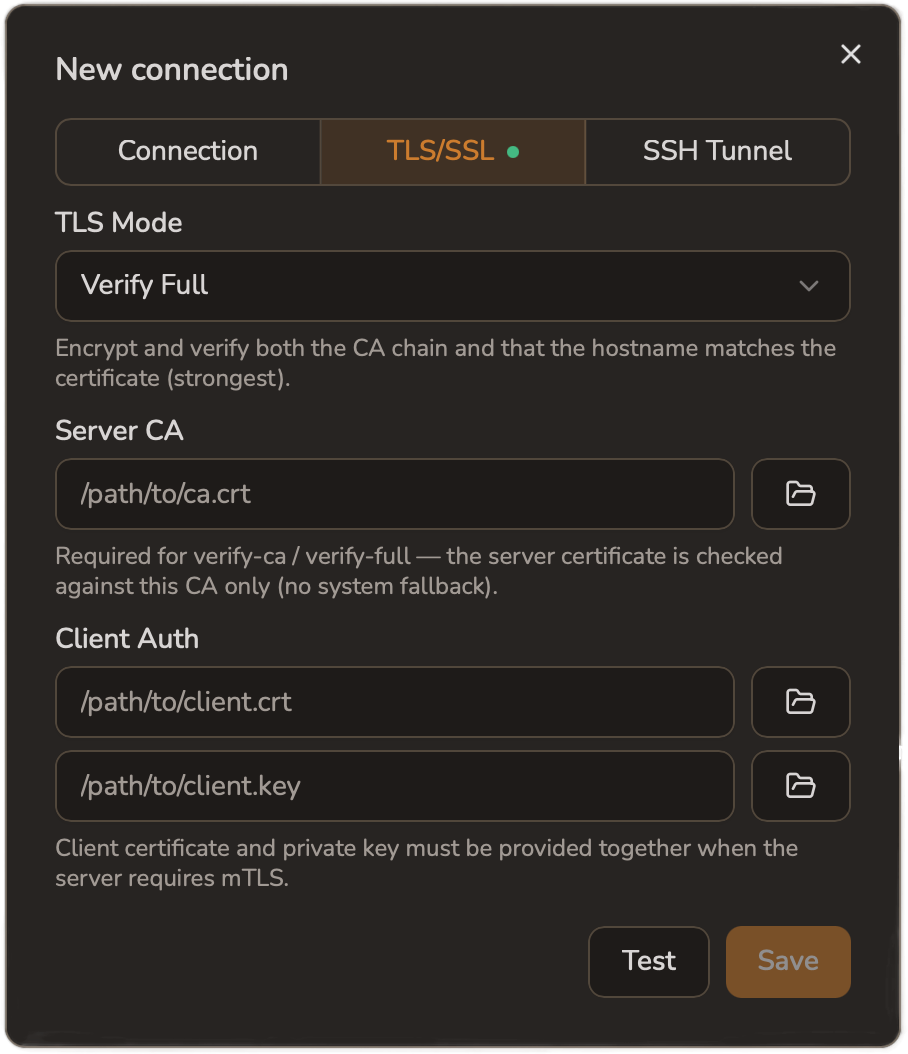
When TLS/SSL is turned on for a connection, its tab shows a small green dot, so you can see at a glance which tab is active.
4. Reach a database through an SSH tunnel
If your database is only reachable through a jump/bastion server, use an SSH tunnel instead of connecting directly:
- Open the connection dialog and click the SSH Tunnel tab.
- Check Connect via SSH tunnel.
- Fill in:
- SSH Host and Port — the address of the SSH server (default port
22). - SSH User — your SSH login name.
- SSH Password — leave this empty if you are using a key file instead.
- Key Path — the path to your private key file (for example
~/.ssh/id_rsa). You can browse for it with the folder icon. - Key Passphrase — leave this empty if your key file is not encrypted.
- SSH Timeout (s) — how many seconds to wait before giving up on the tunnel.
- SSH Host and Port — the address of the SSH server (default port
- Click Test, then Save.
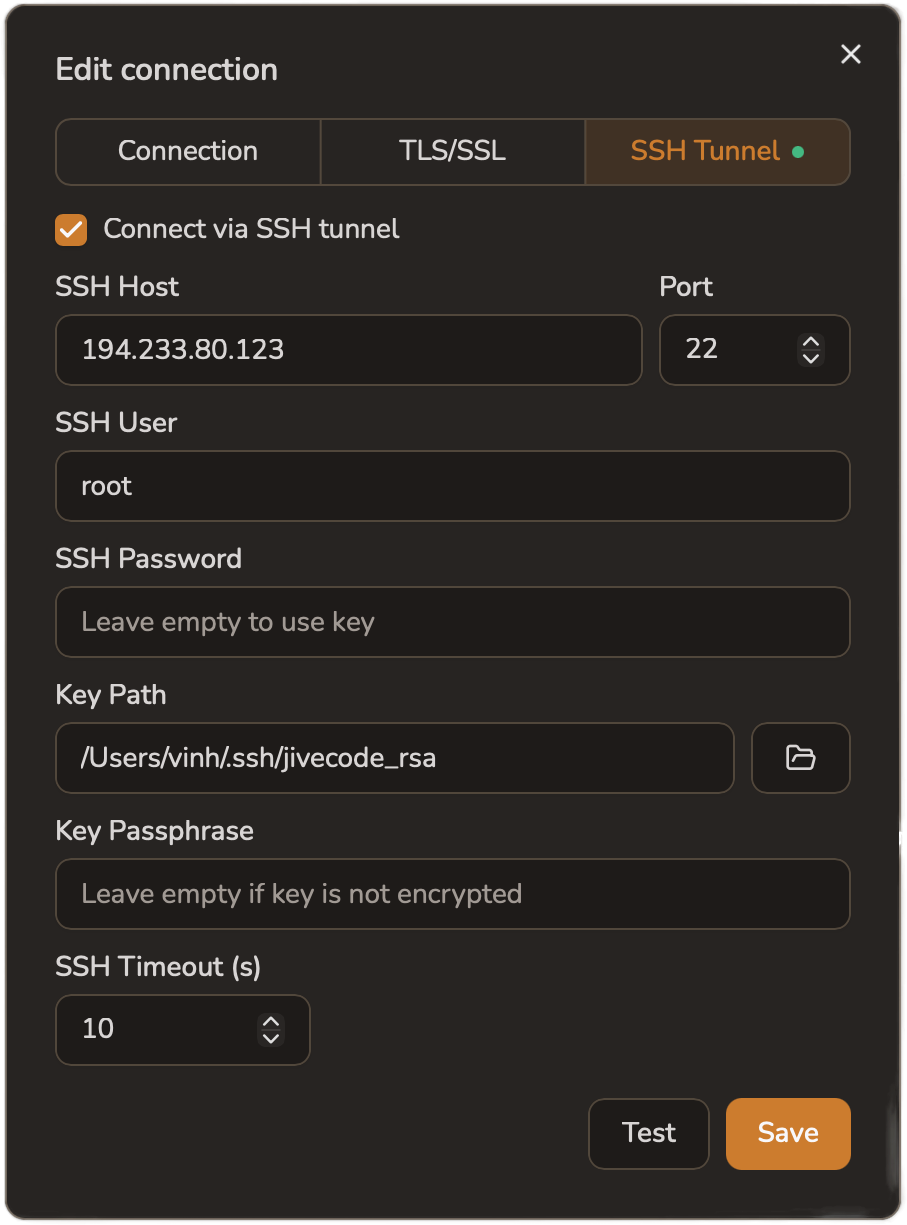
Like the TLS/SSL tab, the SSH Tunnel tab shows a green dot when the tunnel is turned on for that connection.
5. Organize connections into groups
As you save more connections, you can file them into folders (called groups) inside the sidebar's Connections panel:
- Click the folder-plus icon at the top of the Connections panel.
- In the New group dialog, type a Group name.
- Click Confirm.
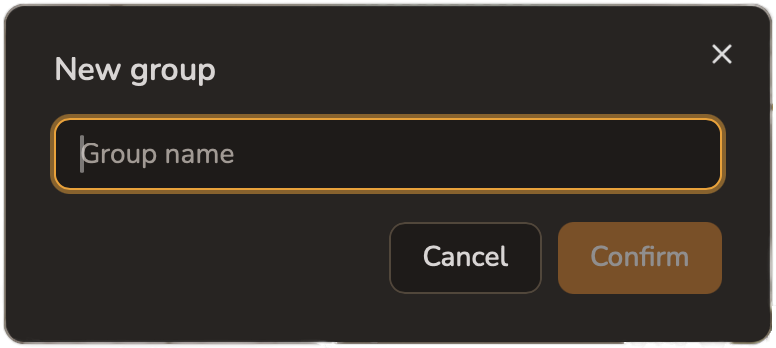
To move an existing connection into a group, either set the Group field in its connection dialog (see section 2), or right-click the connection in the sidebar and choose a "move to group" action. Right-click menus for the sidebar tree are covered in Chapter 3 — Navigation and search.
6. How your password is stored
JiveDB encrypts every saved password at rest, using AES-256-GCM, before writing it to disk. The encryption key file and the connections file are both saved with restricted file permissions on your computer, so only your own user account can read them.
This is why the Test button exists: it lets you confirm the connection works before you save it, without needing to re-enter the password later.