This chapter covers the rest of the Settings dialog (Hotkeys, AI Providers, Developer), the full keyboard shortcut reference, the command palette, and the floating App Logs panel.
Contents
1. The Settings dialog
Click the gear icon in the toolbar to open Settings. It has four sections, listed on the left: Appearance, Hotkeys, AI Providers, Developer. Appearance is covered in Chapter 12.
2. Hotkeys reference
The Hotkeys section lists every keyboard shortcut, grouped by where it applies:
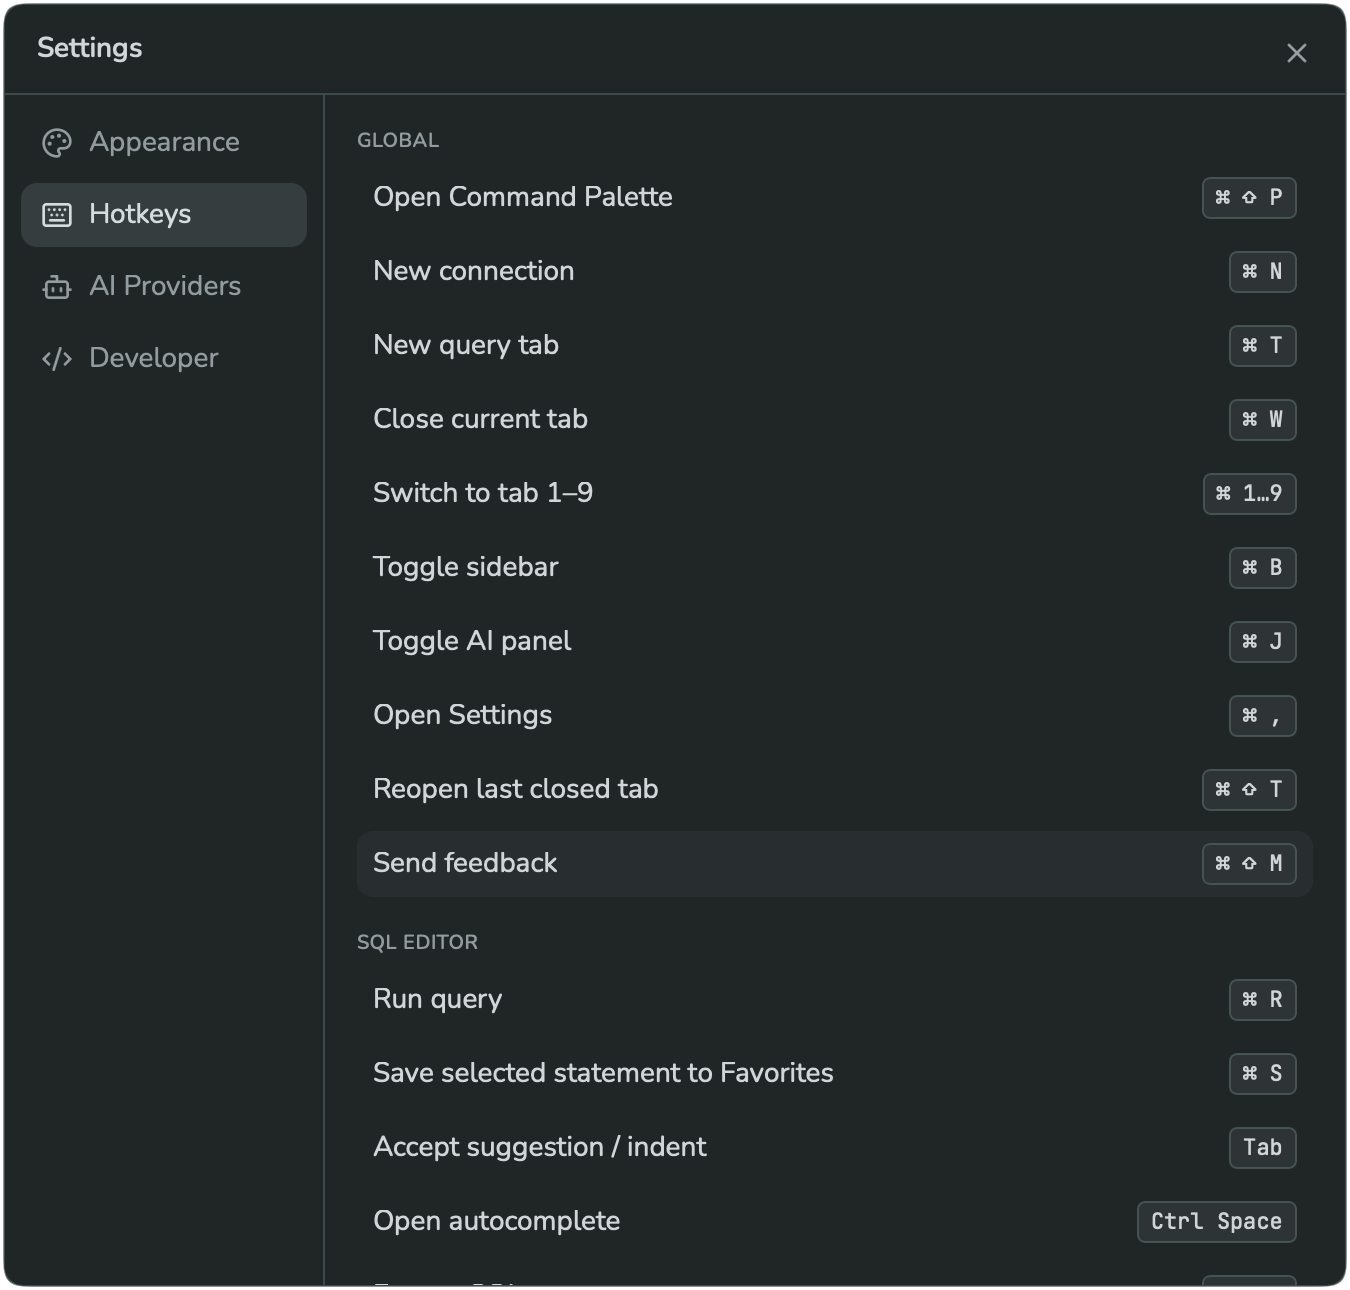
Mod means ⌘ on macOS, or Ctrl on Windows/Linux.
Global
| Action | Shortcut |
|---|---|
| Open Command Palette | Mod+Shift+P |
| New connection | Mod+N |
| New query tab | Mod+T |
| Close current tab | Mod+W |
| Switch to tab 1–9 | Mod+1 … Mod+9 |
| Toggle sidebar | Mod+B |
| Toggle AI panel | Mod+J |
| Open Settings | Mod+, |
| Reopen last closed tab | Mod+Shift+T |
| Send feedback | Mod+Shift+M |
SQL editor
| Action | Shortcut |
|---|---|
| Run query | Mod+R |
| Save selected statement to Favorites | Mod+S |
| Accept suggestion / indent | Tab |
| Open autocomplete | Ctrl+Space |
| Format SQL | Shift+Alt+F |
| Comment / uncomment line | Mod+/ |
| Find in editor | Mod+F |
Data grid
| Action | Shortcut |
|---|---|
| Move between cells | ↑ ↓ ← → |
| Edit the selected cell | Enter |
| Save changes | Mod+Enter |
| Copy cell(s) | Mod+C |
| Deselect / cancel edit | Esc |
| Refresh | Mod+Shift+R |
Command palette
| Action | Shortcut |
|---|---|
| Move through the list | ↑ ↓ |
| Select a command | Enter |
| Close the palette | Esc |
3. AI Providers
The AI Providers section is where you add the AI service(s) used by the AI Assistant:
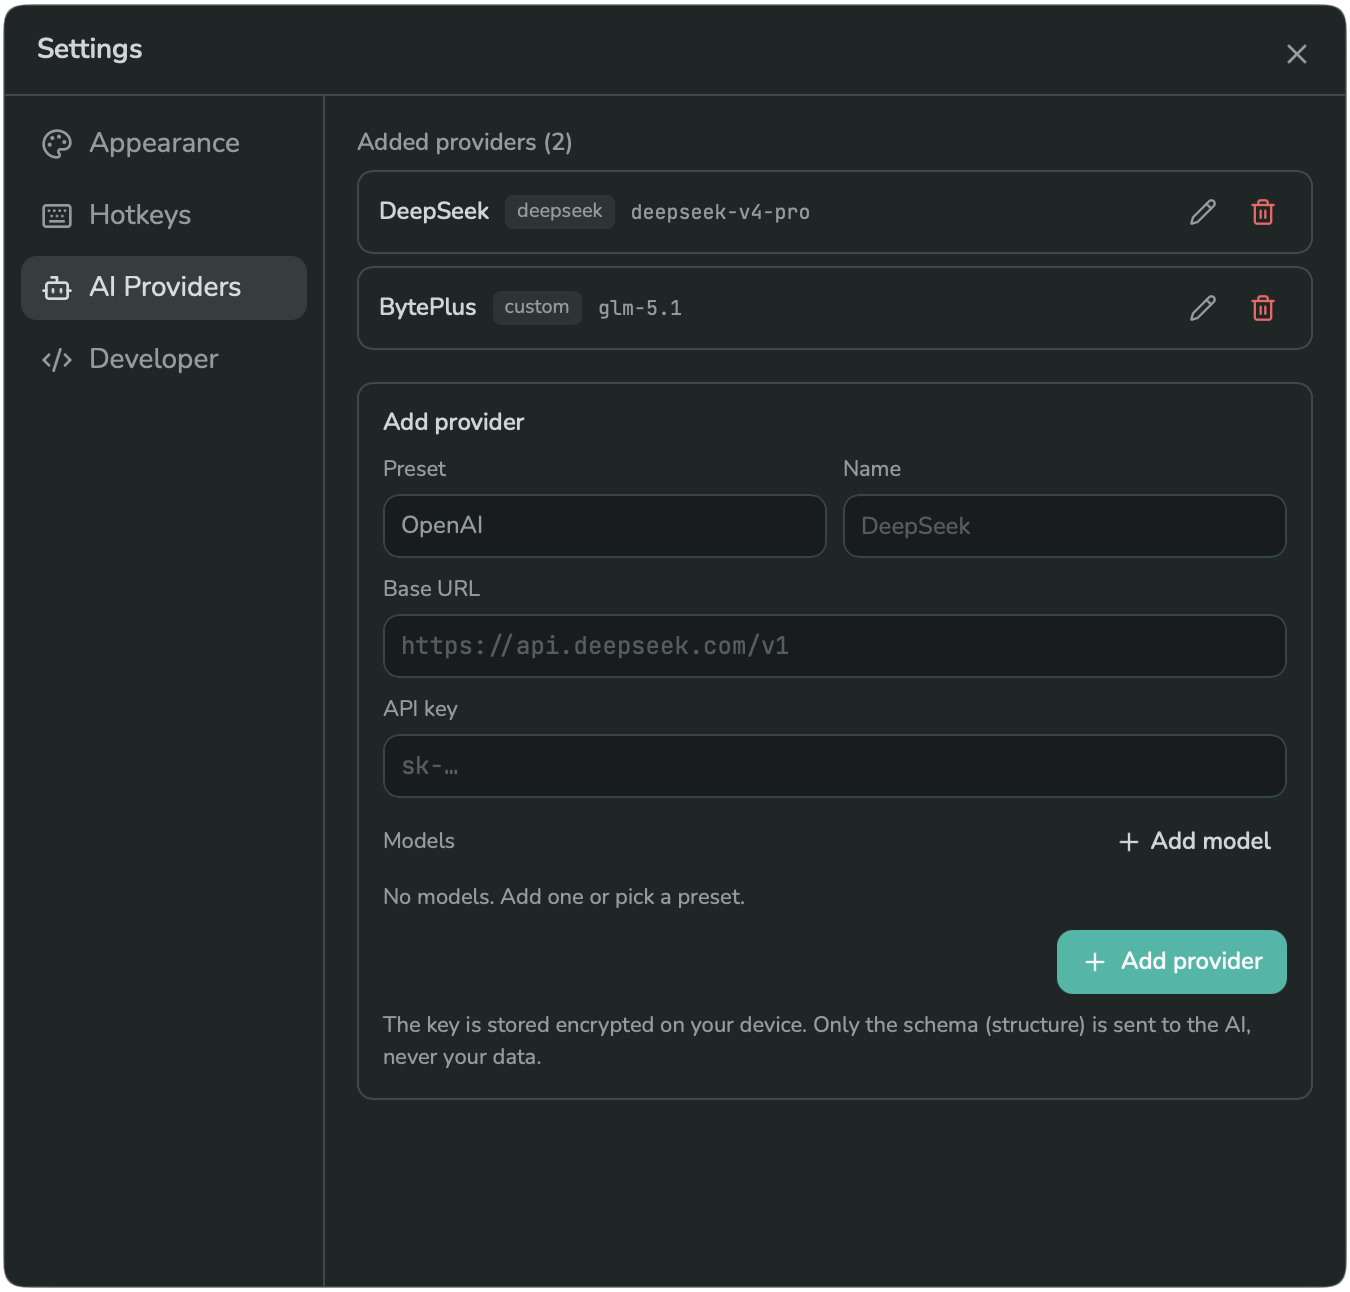
- Under Add provider, pick a Preset (for example OpenAI, Anthropic, DeepSeek, Google Gemini, Groq, Mistral, xAI, OpenRouter, Together, or a local Ollama install) — this fills in a sensible Base URL and model list for you.
- Give it a Name, and confirm or edit the Base URL.
- Enter your API key.
- Add one or more Models for this provider, and mark one as the default.
- Click + Add provider.
Each added provider is listed with its name, a badge for its preset, and its default model, with pencil (edit) and trash (delete) icons. As the panel itself notes: "The key is stored encrypted on your device. Only the schema (structure) is sent to the AI, never your data."
4. Developer tools
The Developer section has three utilities, mainly useful when troubleshooting:
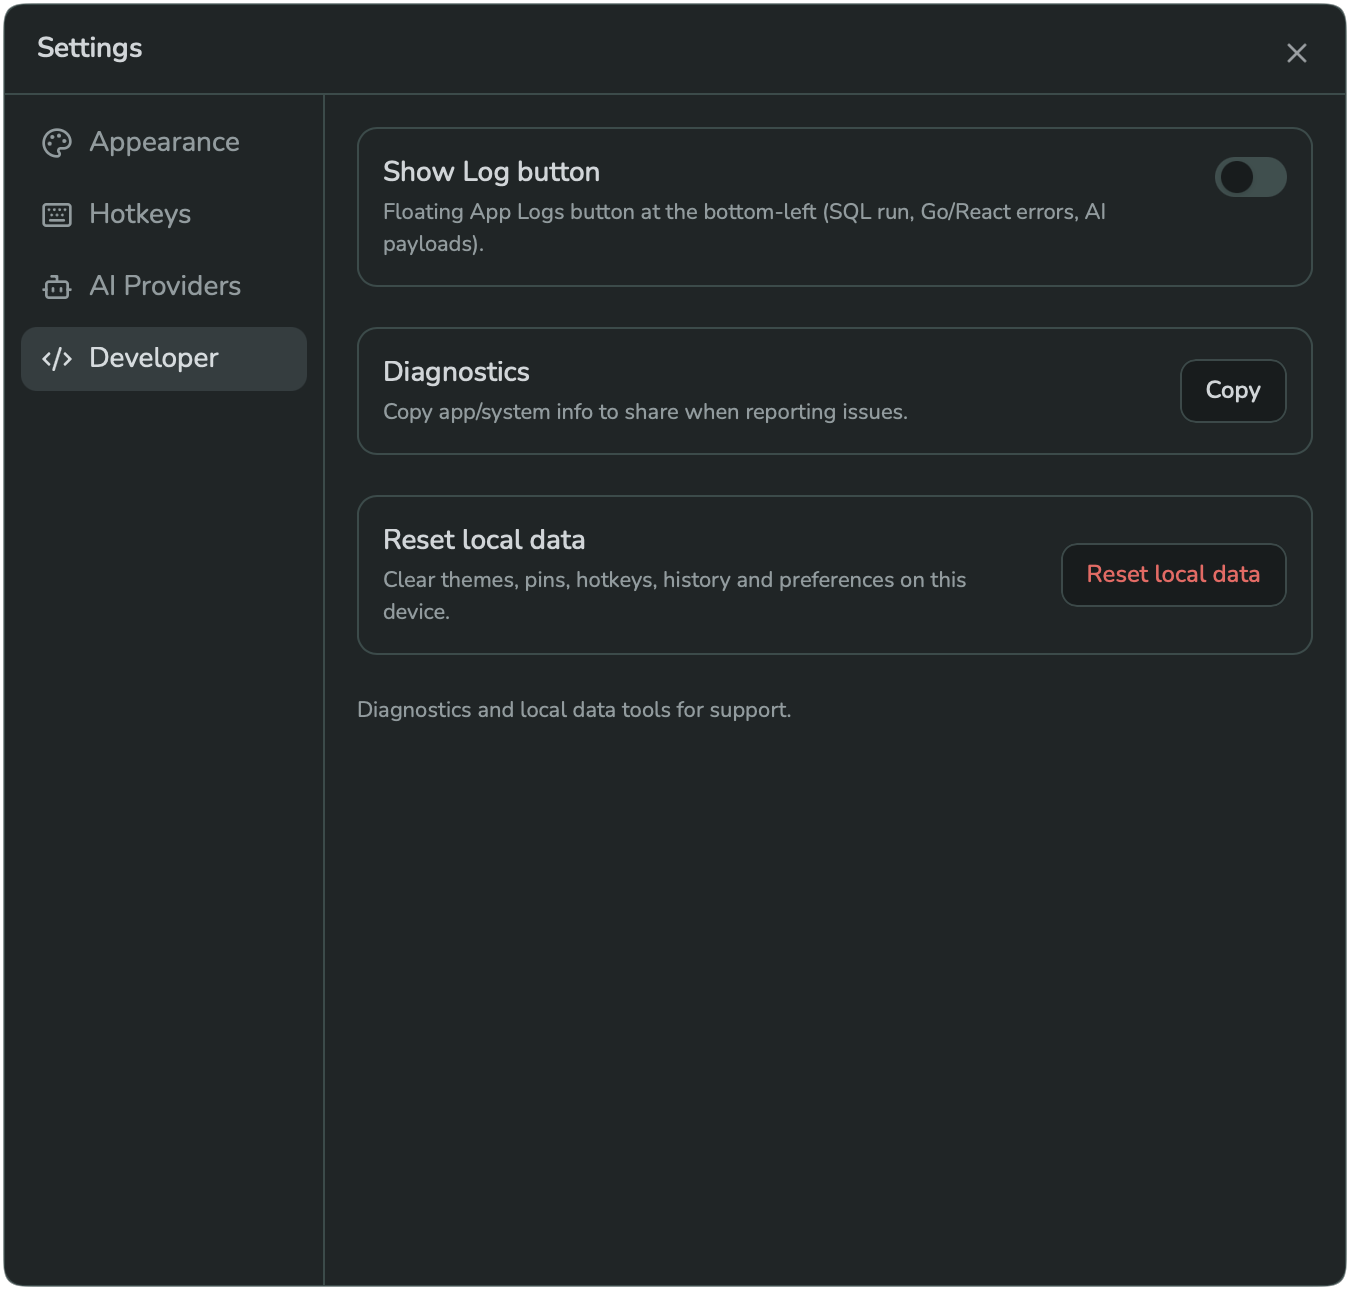
- Show Log button — turns on a floating App Logs button, bottom-left of the window (see section 6).
- Diagnostics — click Copy to copy your app/system information, to include when reporting an issue.
- Reset local data — clears themes, pins, hotkeys, history, and other local preferences on this device, then reloads the app. This does not touch your saved connections.
5. Command palette
Press Mod+Shift+P anywhere in the app to open the command palette — a fast way to jump to an action without using the mouse:
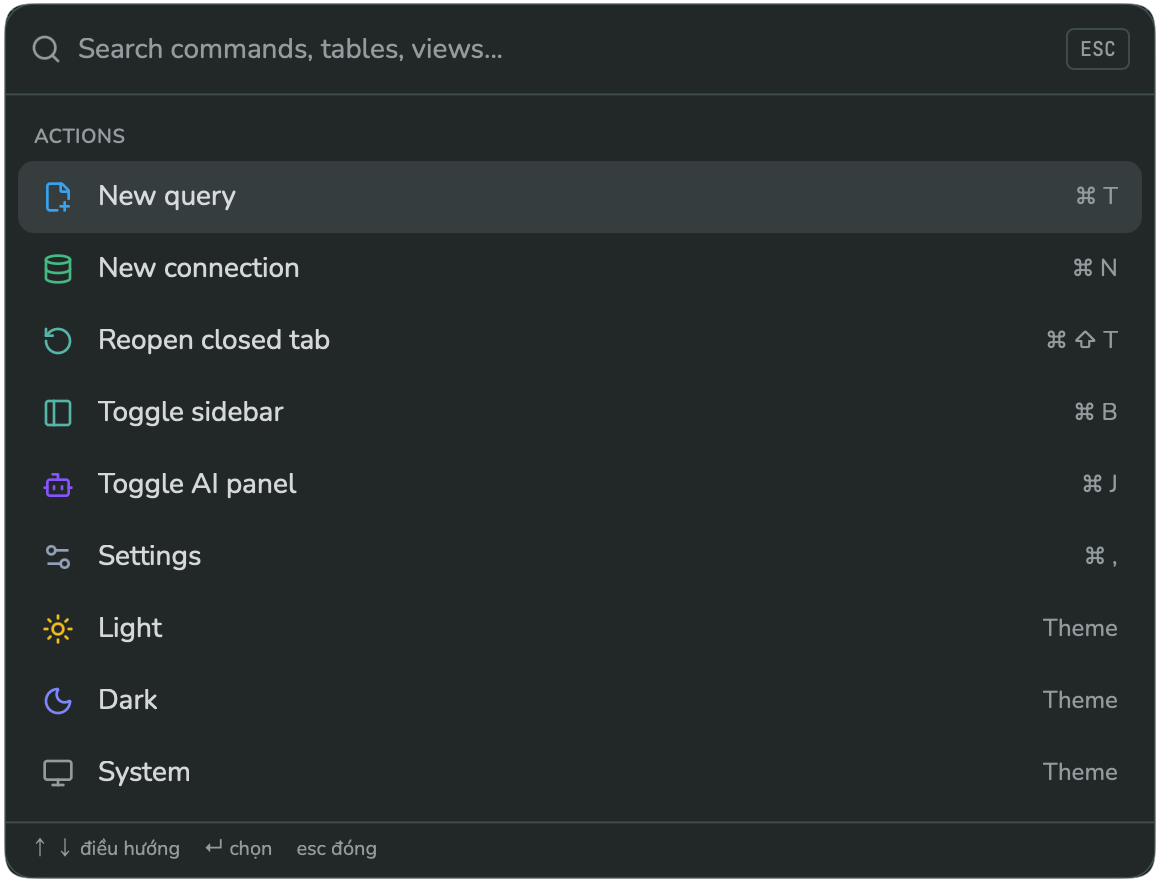
Type to filter the list (placeholder: "Search commands, tables, views..."). As you type a table or view name, matching objects appear alongside actions. Use ↑ ↓ to move, Enter to run the highlighted item, and Esc to close.
6. App Logs
When Show Log button is turned on in Developer settings, a floating button appears at the bottom-left of the window. Click it to open the App Logs panel:
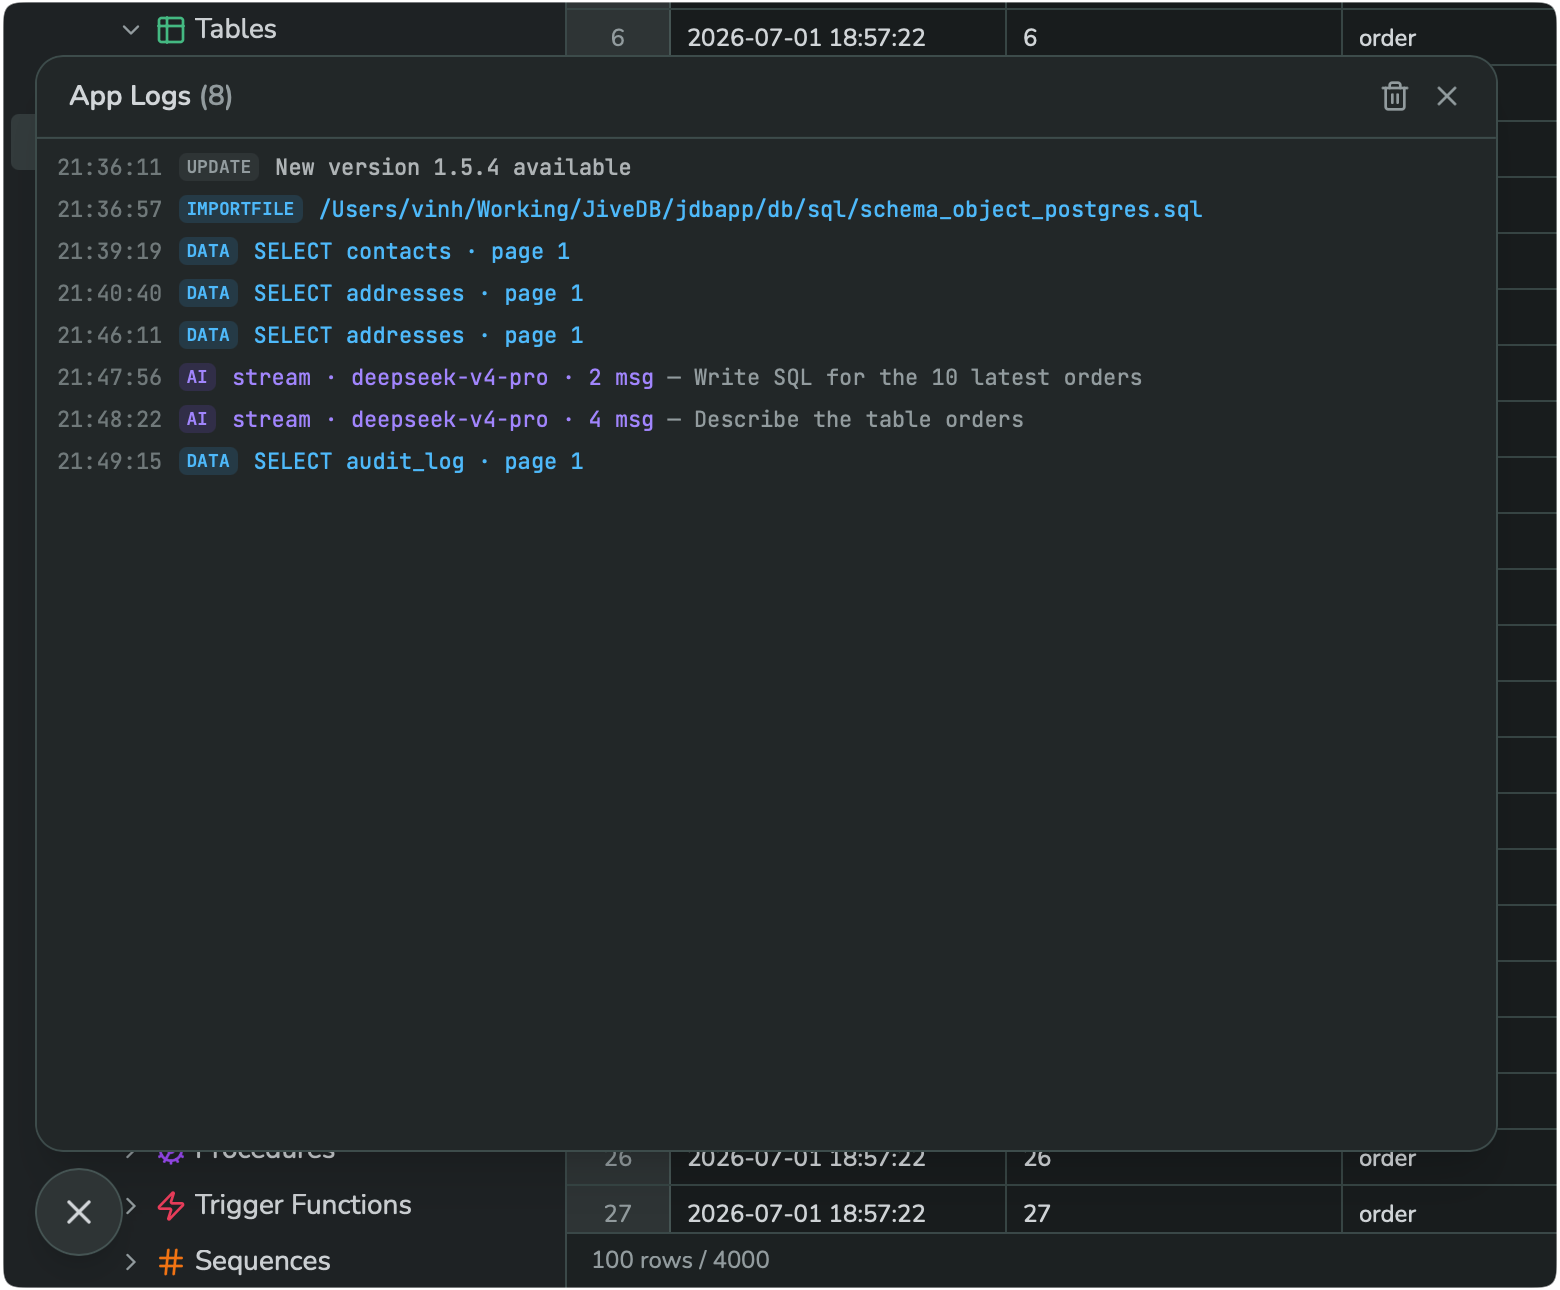
Each entry shows a timestamp, a colored tag (for example UPDATE, IMPORTFILE, DATA, AI), and a short description — such as a query that ran, a file that was imported, or an AI request. Click the trash icon to clear the log, or the X to close the panel.