The data grid is where you view and edit table rows. It supports finding and replacing text, conditional formatting, several density levels, auto-refresh, export, cell/row editing, and a foreign-key-aware detail panel. This chapter covers all of it, step by step.
Contents
- Opening a table
- Find and replace
- Conditional formatting
- Row height (density)
- Auto-refresh
- Exporting data
- Cell detail and foreign keys
- Adding a row
- Selecting cells, columns, and rows
- Paging
- Row mode vs. cell mode editing
- Editing a row or a cell
- In-line editing
- Viewing a row as JSON, with foreign keys expanded
1. Opening a table
Double-click a table in the sidebar, or right-click it and choose View Data (see Chapter 3). The table opens as a new tab, with its data loaded into the grid.
The grid toolbar has these controls, left to right: a quick search box ("Search loaded rows..."), Filter, Columns, Find, Format, a density button, Refresh (with an auto-refresh interval next to it), Export, Cell detail, and + Add row.
2. Find and replace
Click Find to open the Find & Replace bar above the grid:
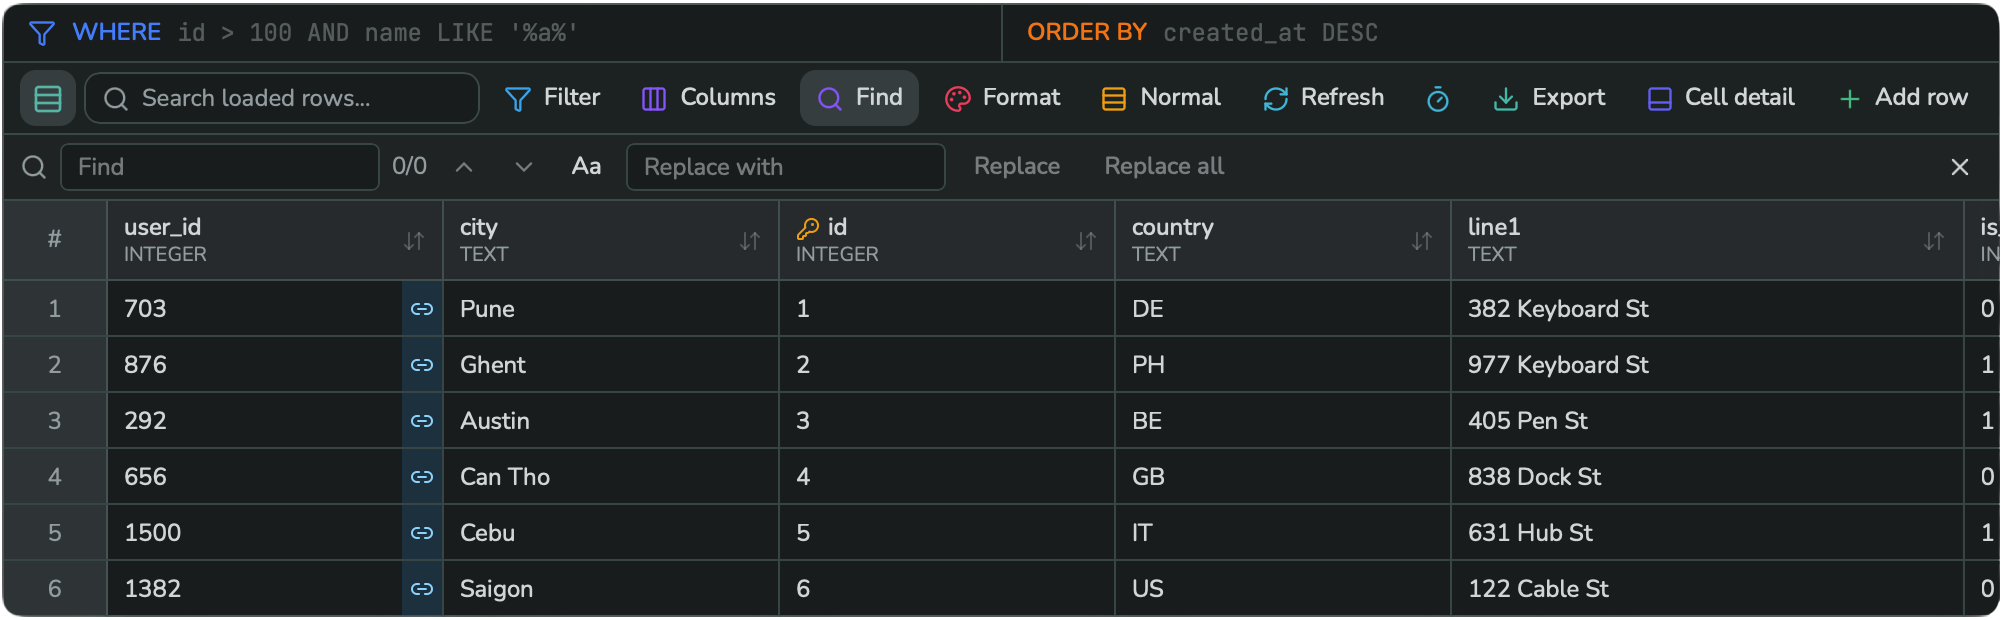
- Type in the Find box; a counter shows how many matches were found (for example
0/0). - Use the up/down arrows to jump between matches.
- Click Aa to toggle case-sensitive matching.
- Type a replacement in Replace with, then click Replace (one match) or Replace all.
- Click X to close the bar.
3. Conditional formatting
Click Format to open the Conditional formatting dialog, and highlight cells that match a rule with a color:
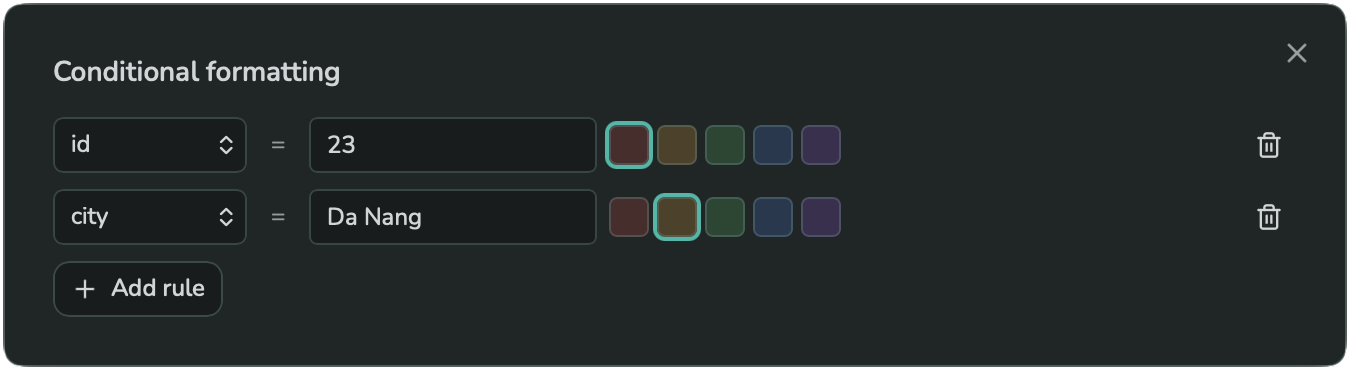
- Click + Add rule.
- Pick a column, type the value to match, and pick one of 5 colors.
- Repeat for more rules if you want.
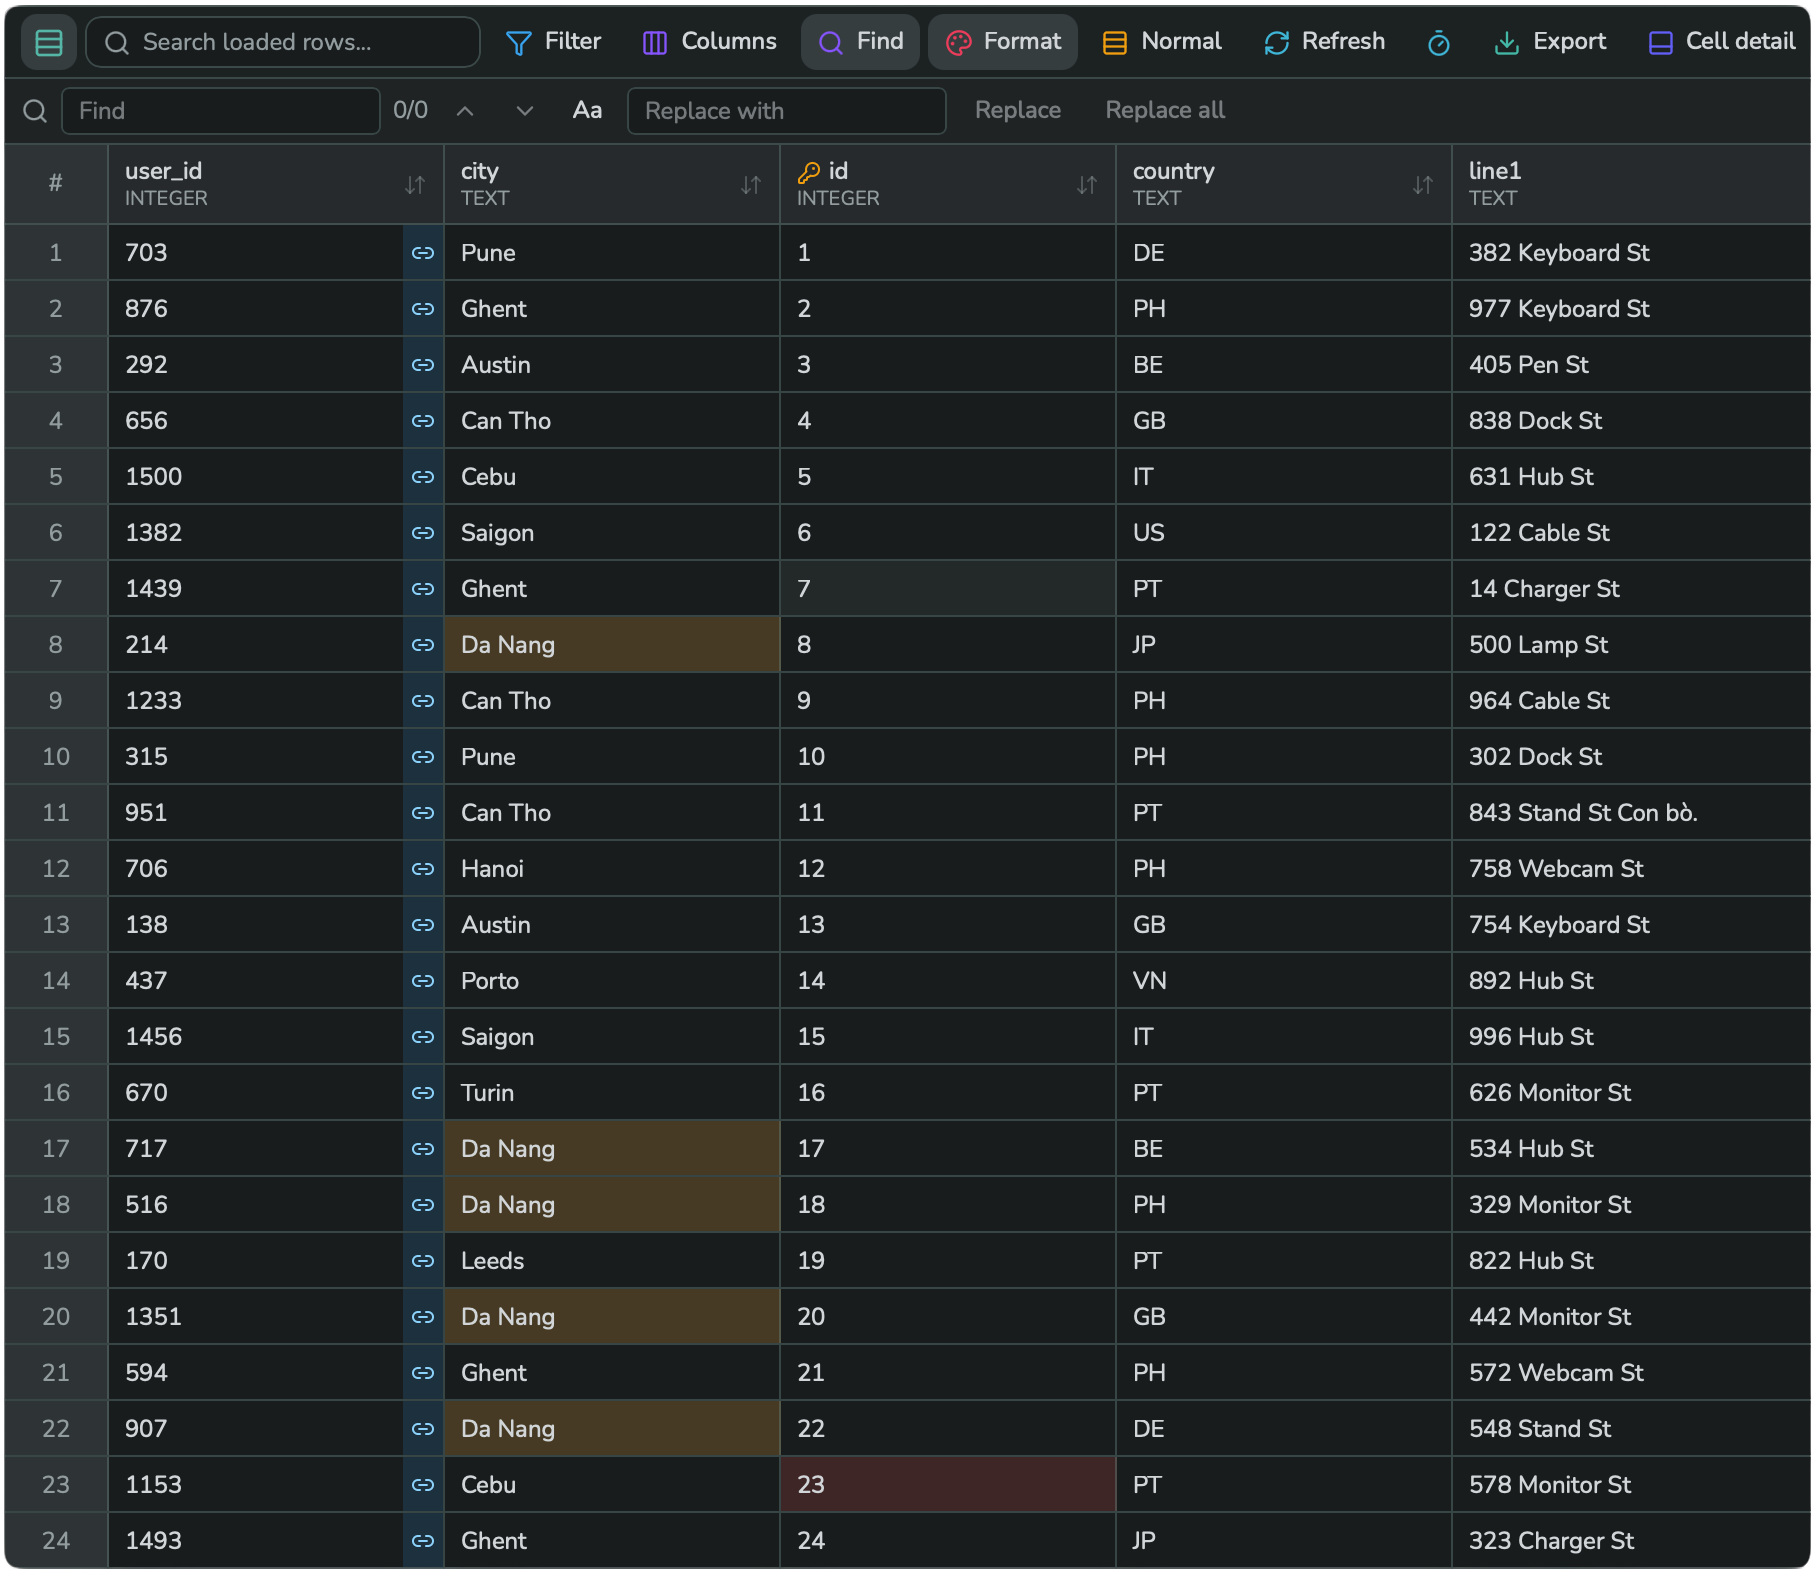
Matching cells are highlighted immediately, and the highlight stays as you scroll or page through the table:
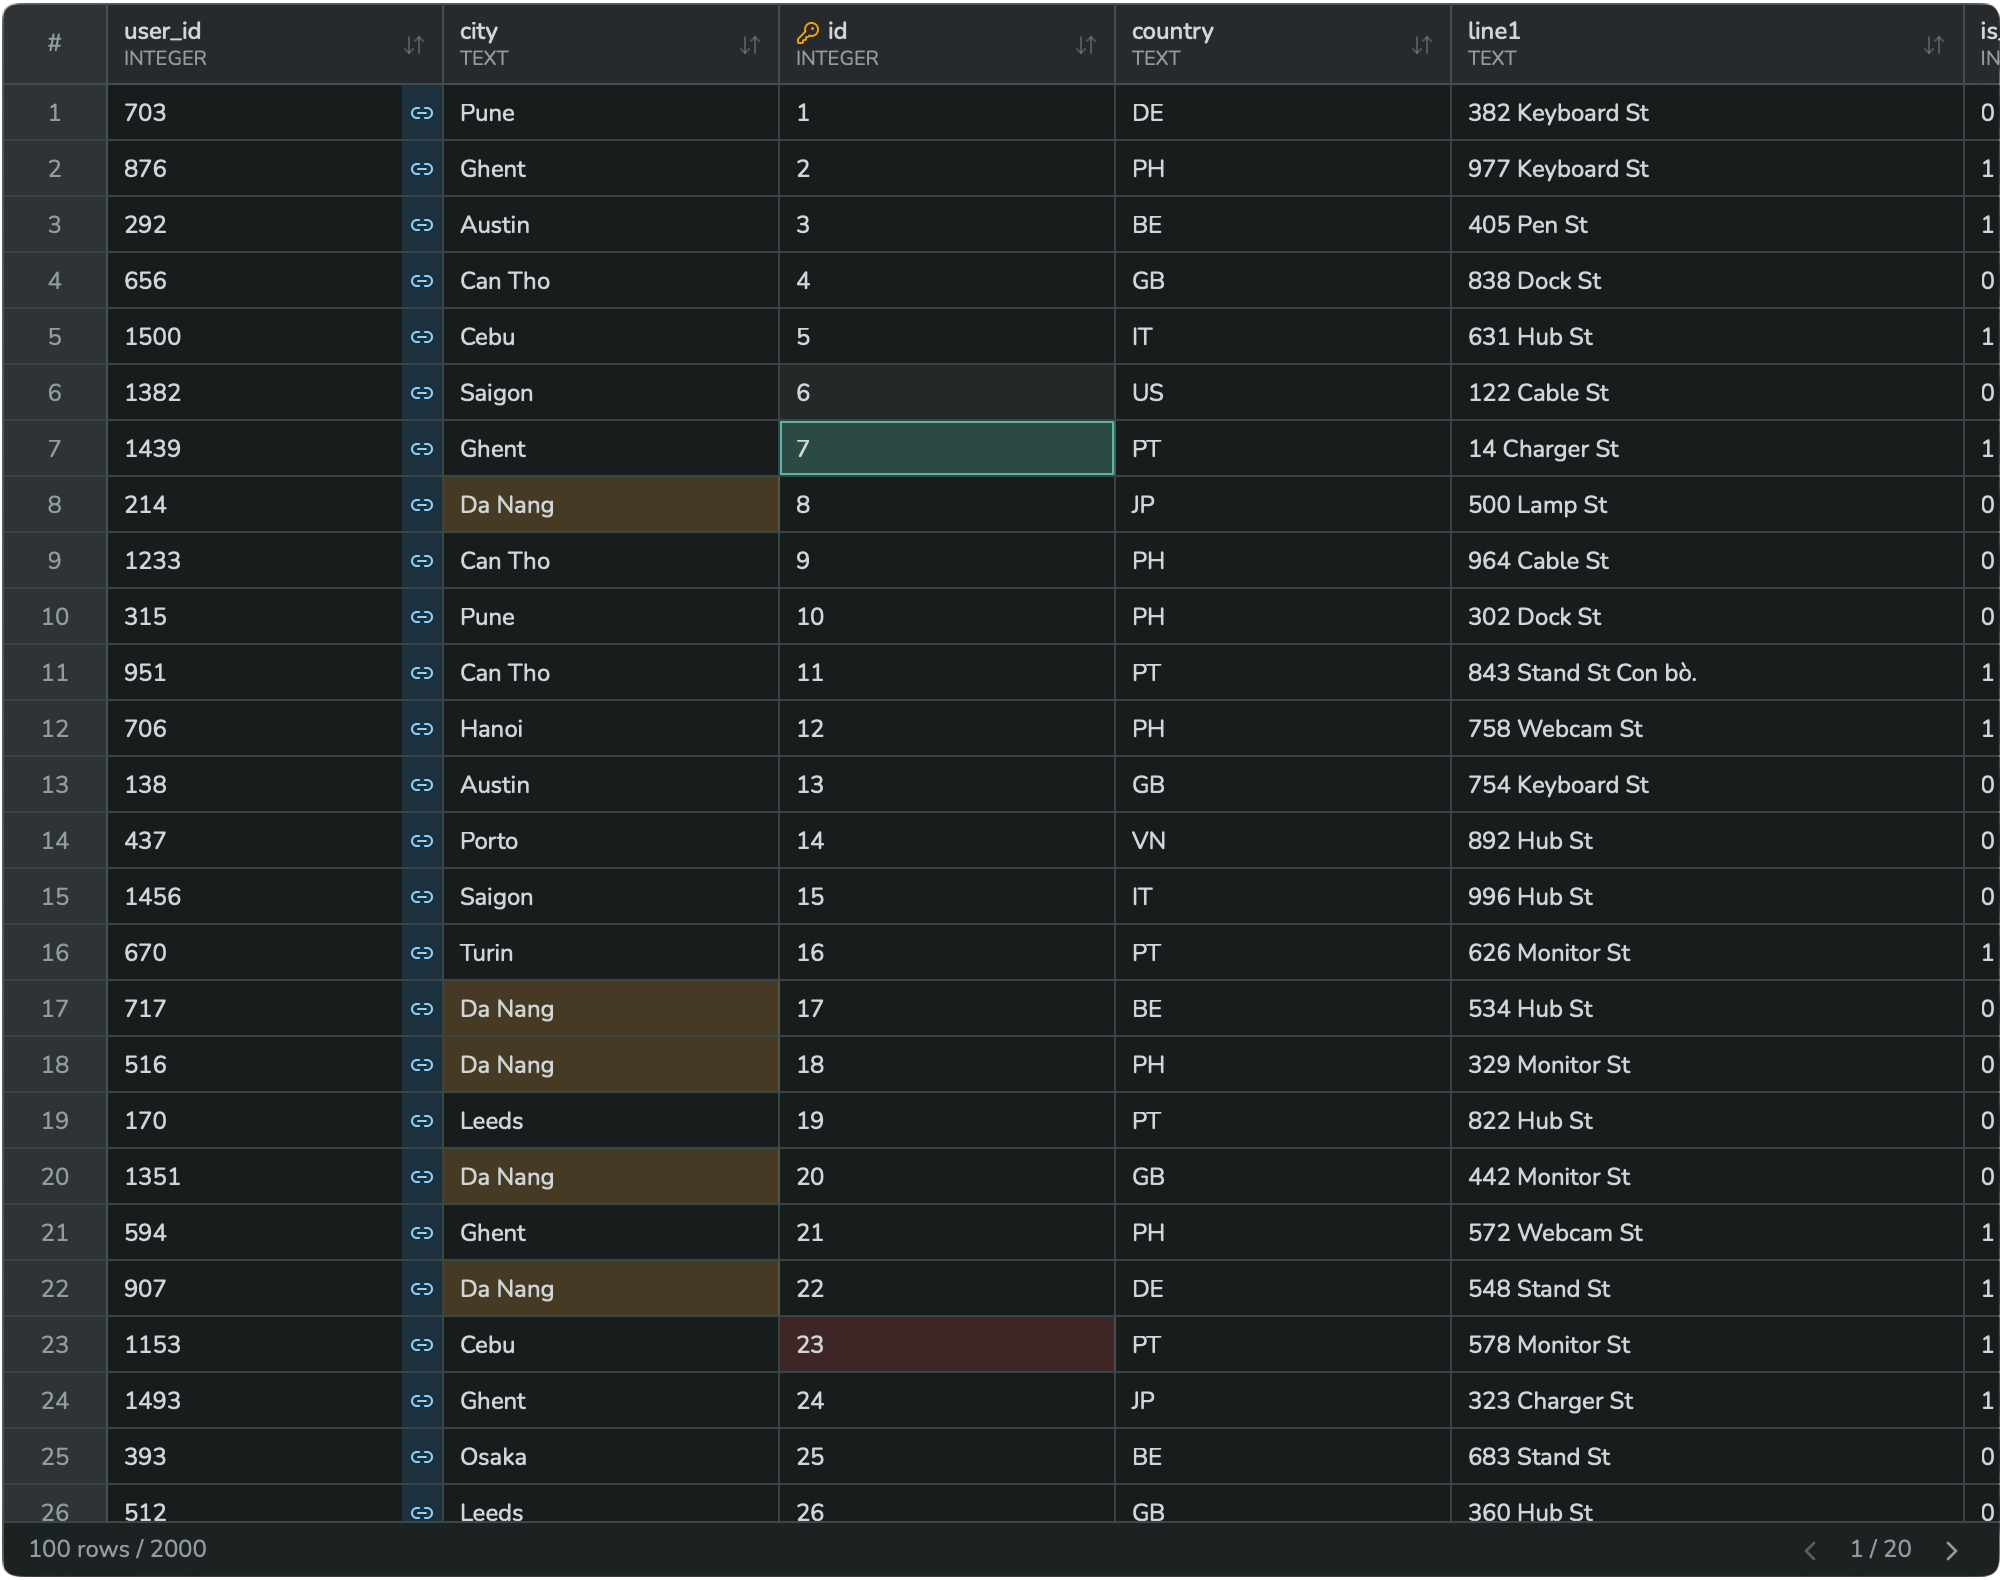
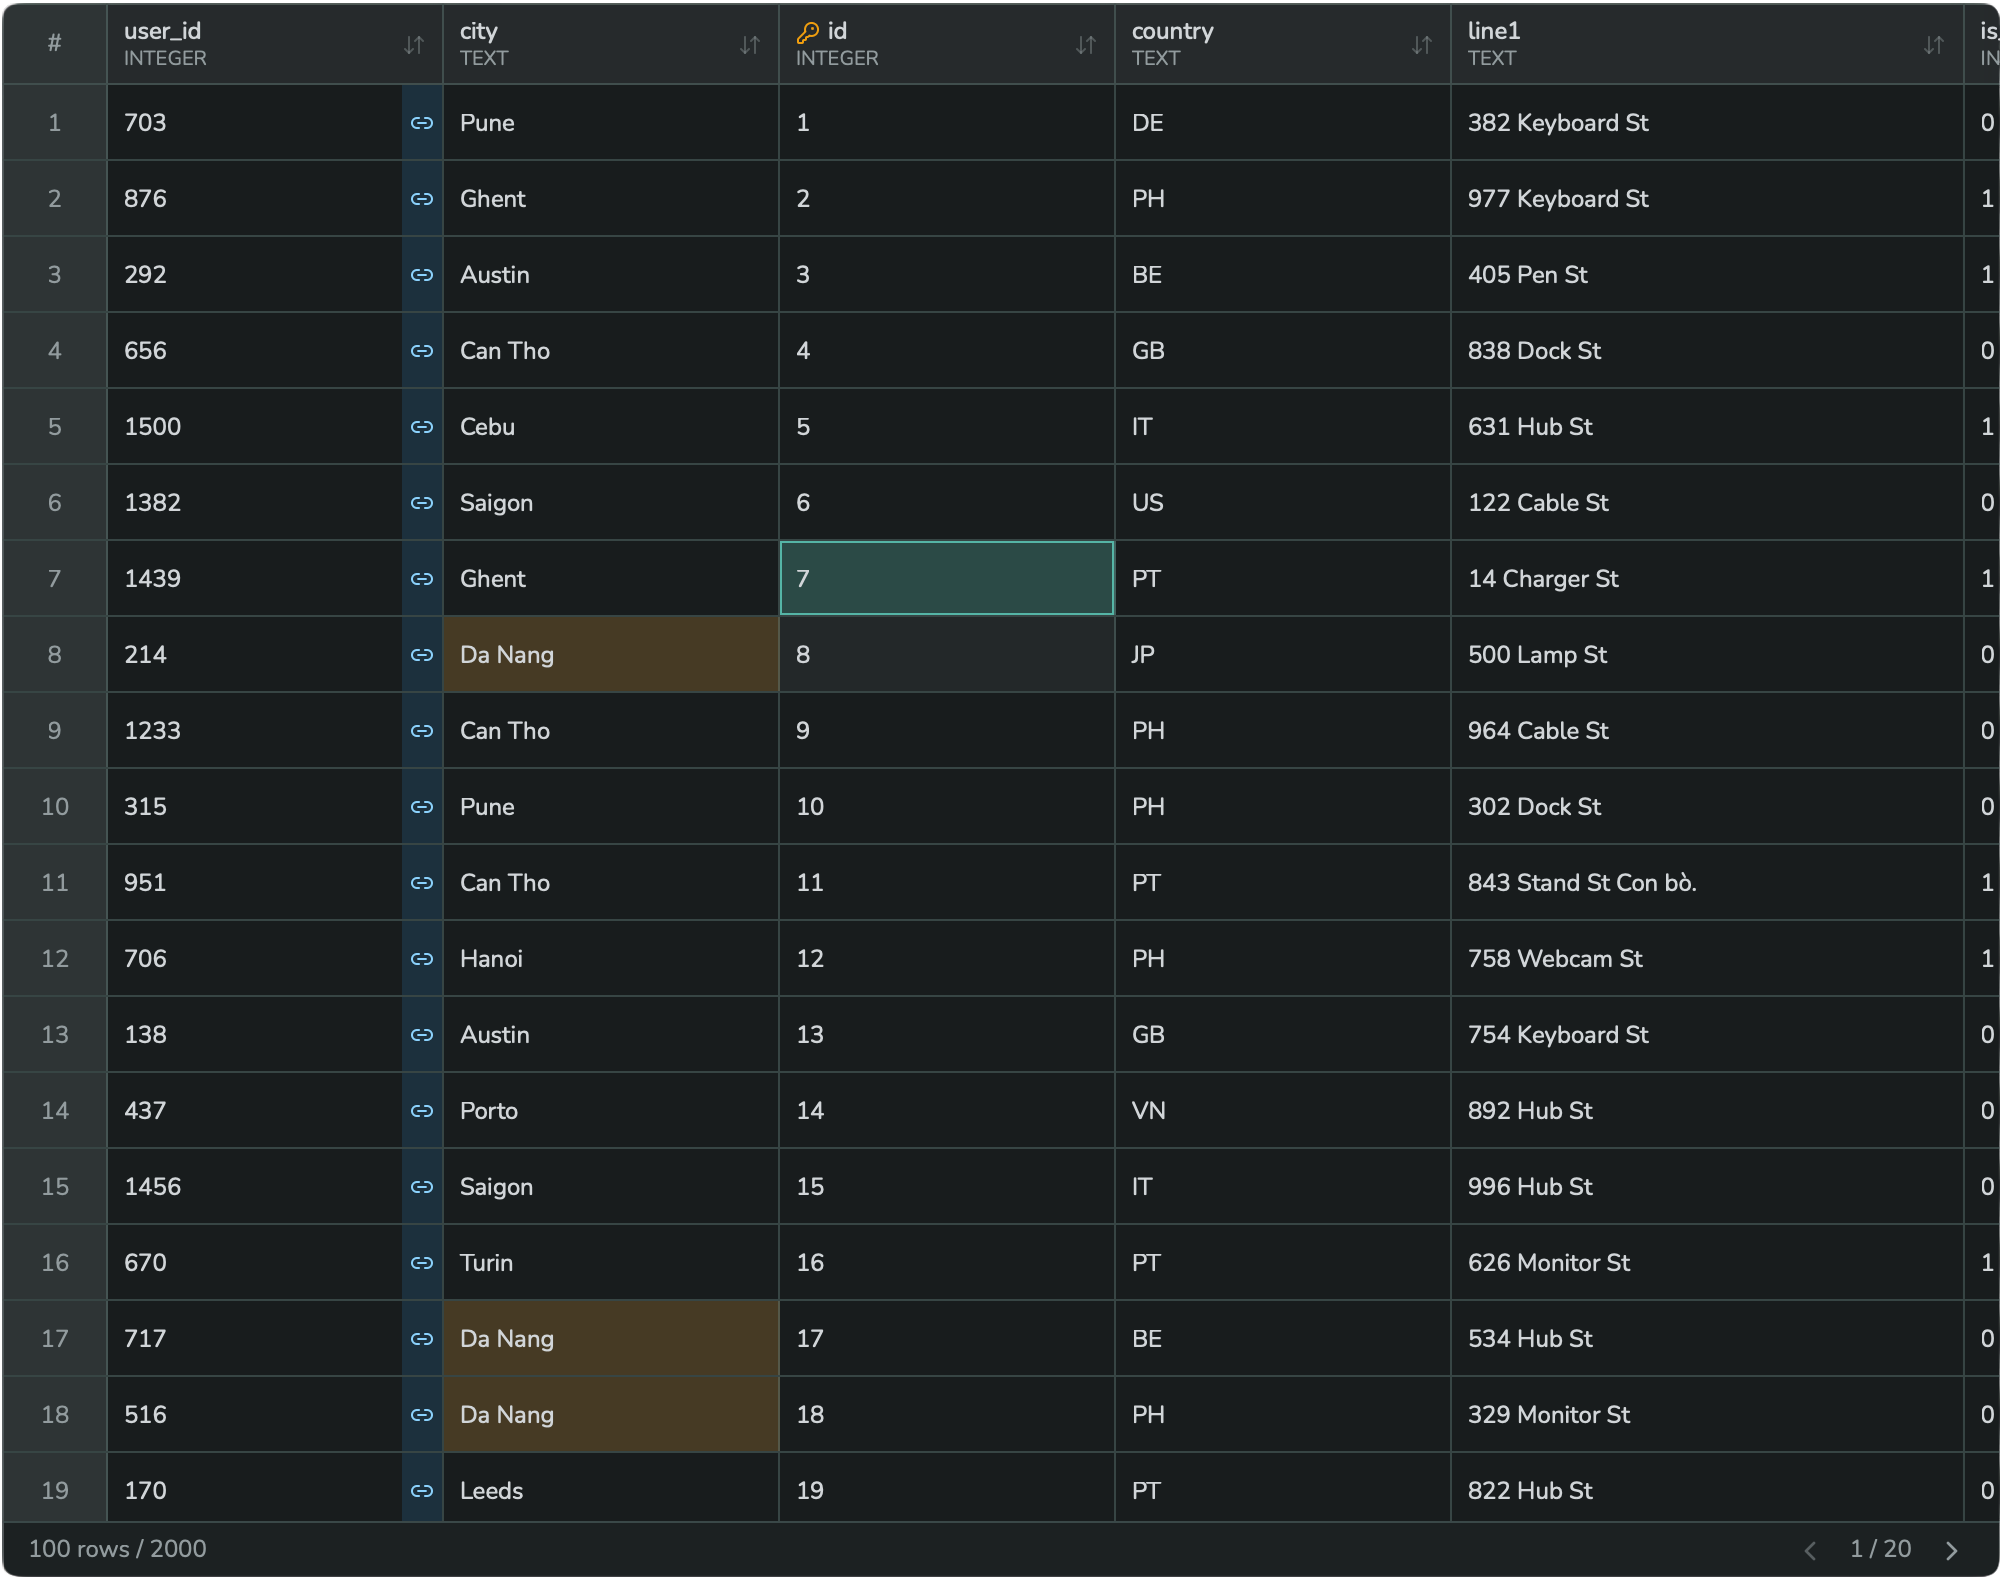
4. Row height (density)
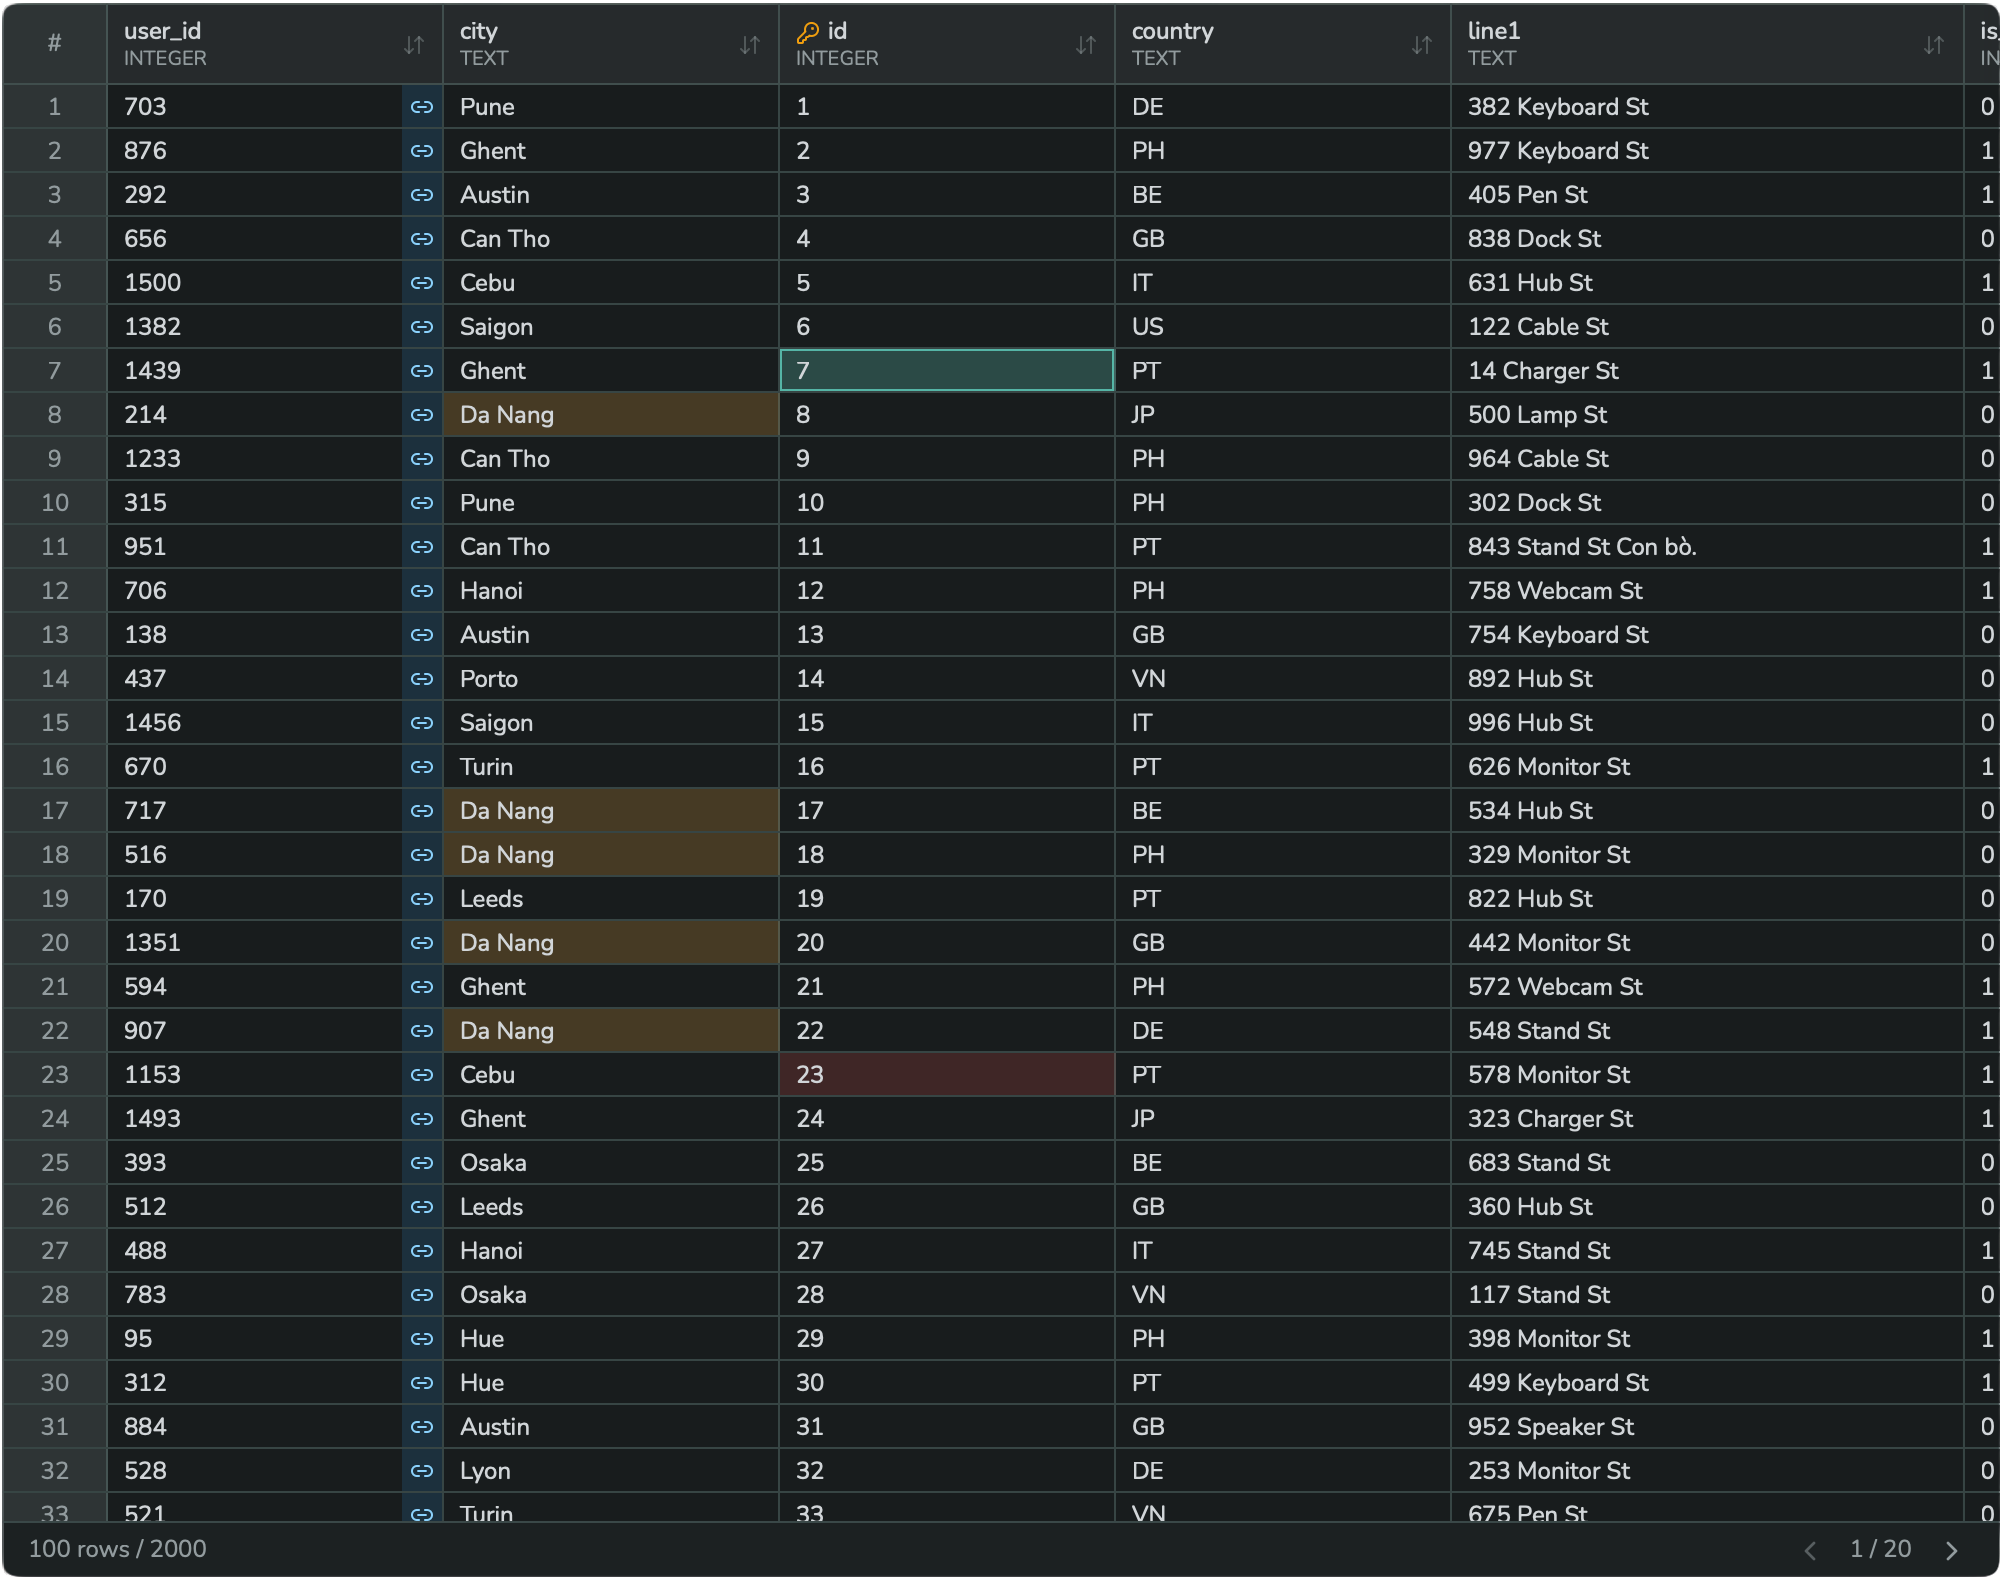
Click the density button in the toolbar to cycle through three row heights: Compact → Normal → Comfortable → Compact, and so on.
5. Auto-refresh
Click the timer icon next to Refresh to have the grid reload automatically on a fixed interval:
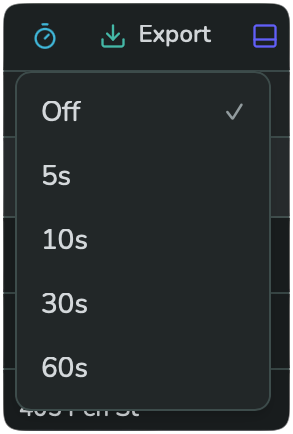
Choose Off, 5s, 10s, 30s, or 60s. This is useful while watching a table that another process is actively writing to.
6. Exporting data
Click Export to save the current result to a file, or copy it to the clipboard:
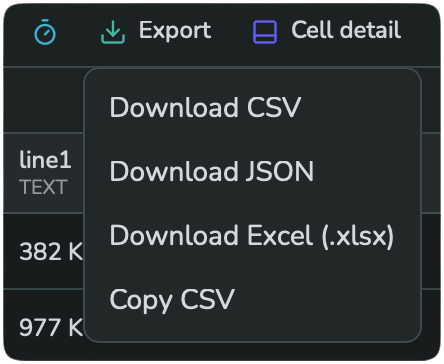
- Download CSV
- Download JSON
- Download Excel (.xlsx)
- Copy CSV — copies straight to the clipboard, no file dialog.
Downloads open your operating system's native Save File dialog, so you choose exactly where the file goes.
7. Cell detail and foreign keys
Click Cell detail to open a docked panel at the bottom of the grid, showing full details for the currently selected cell:
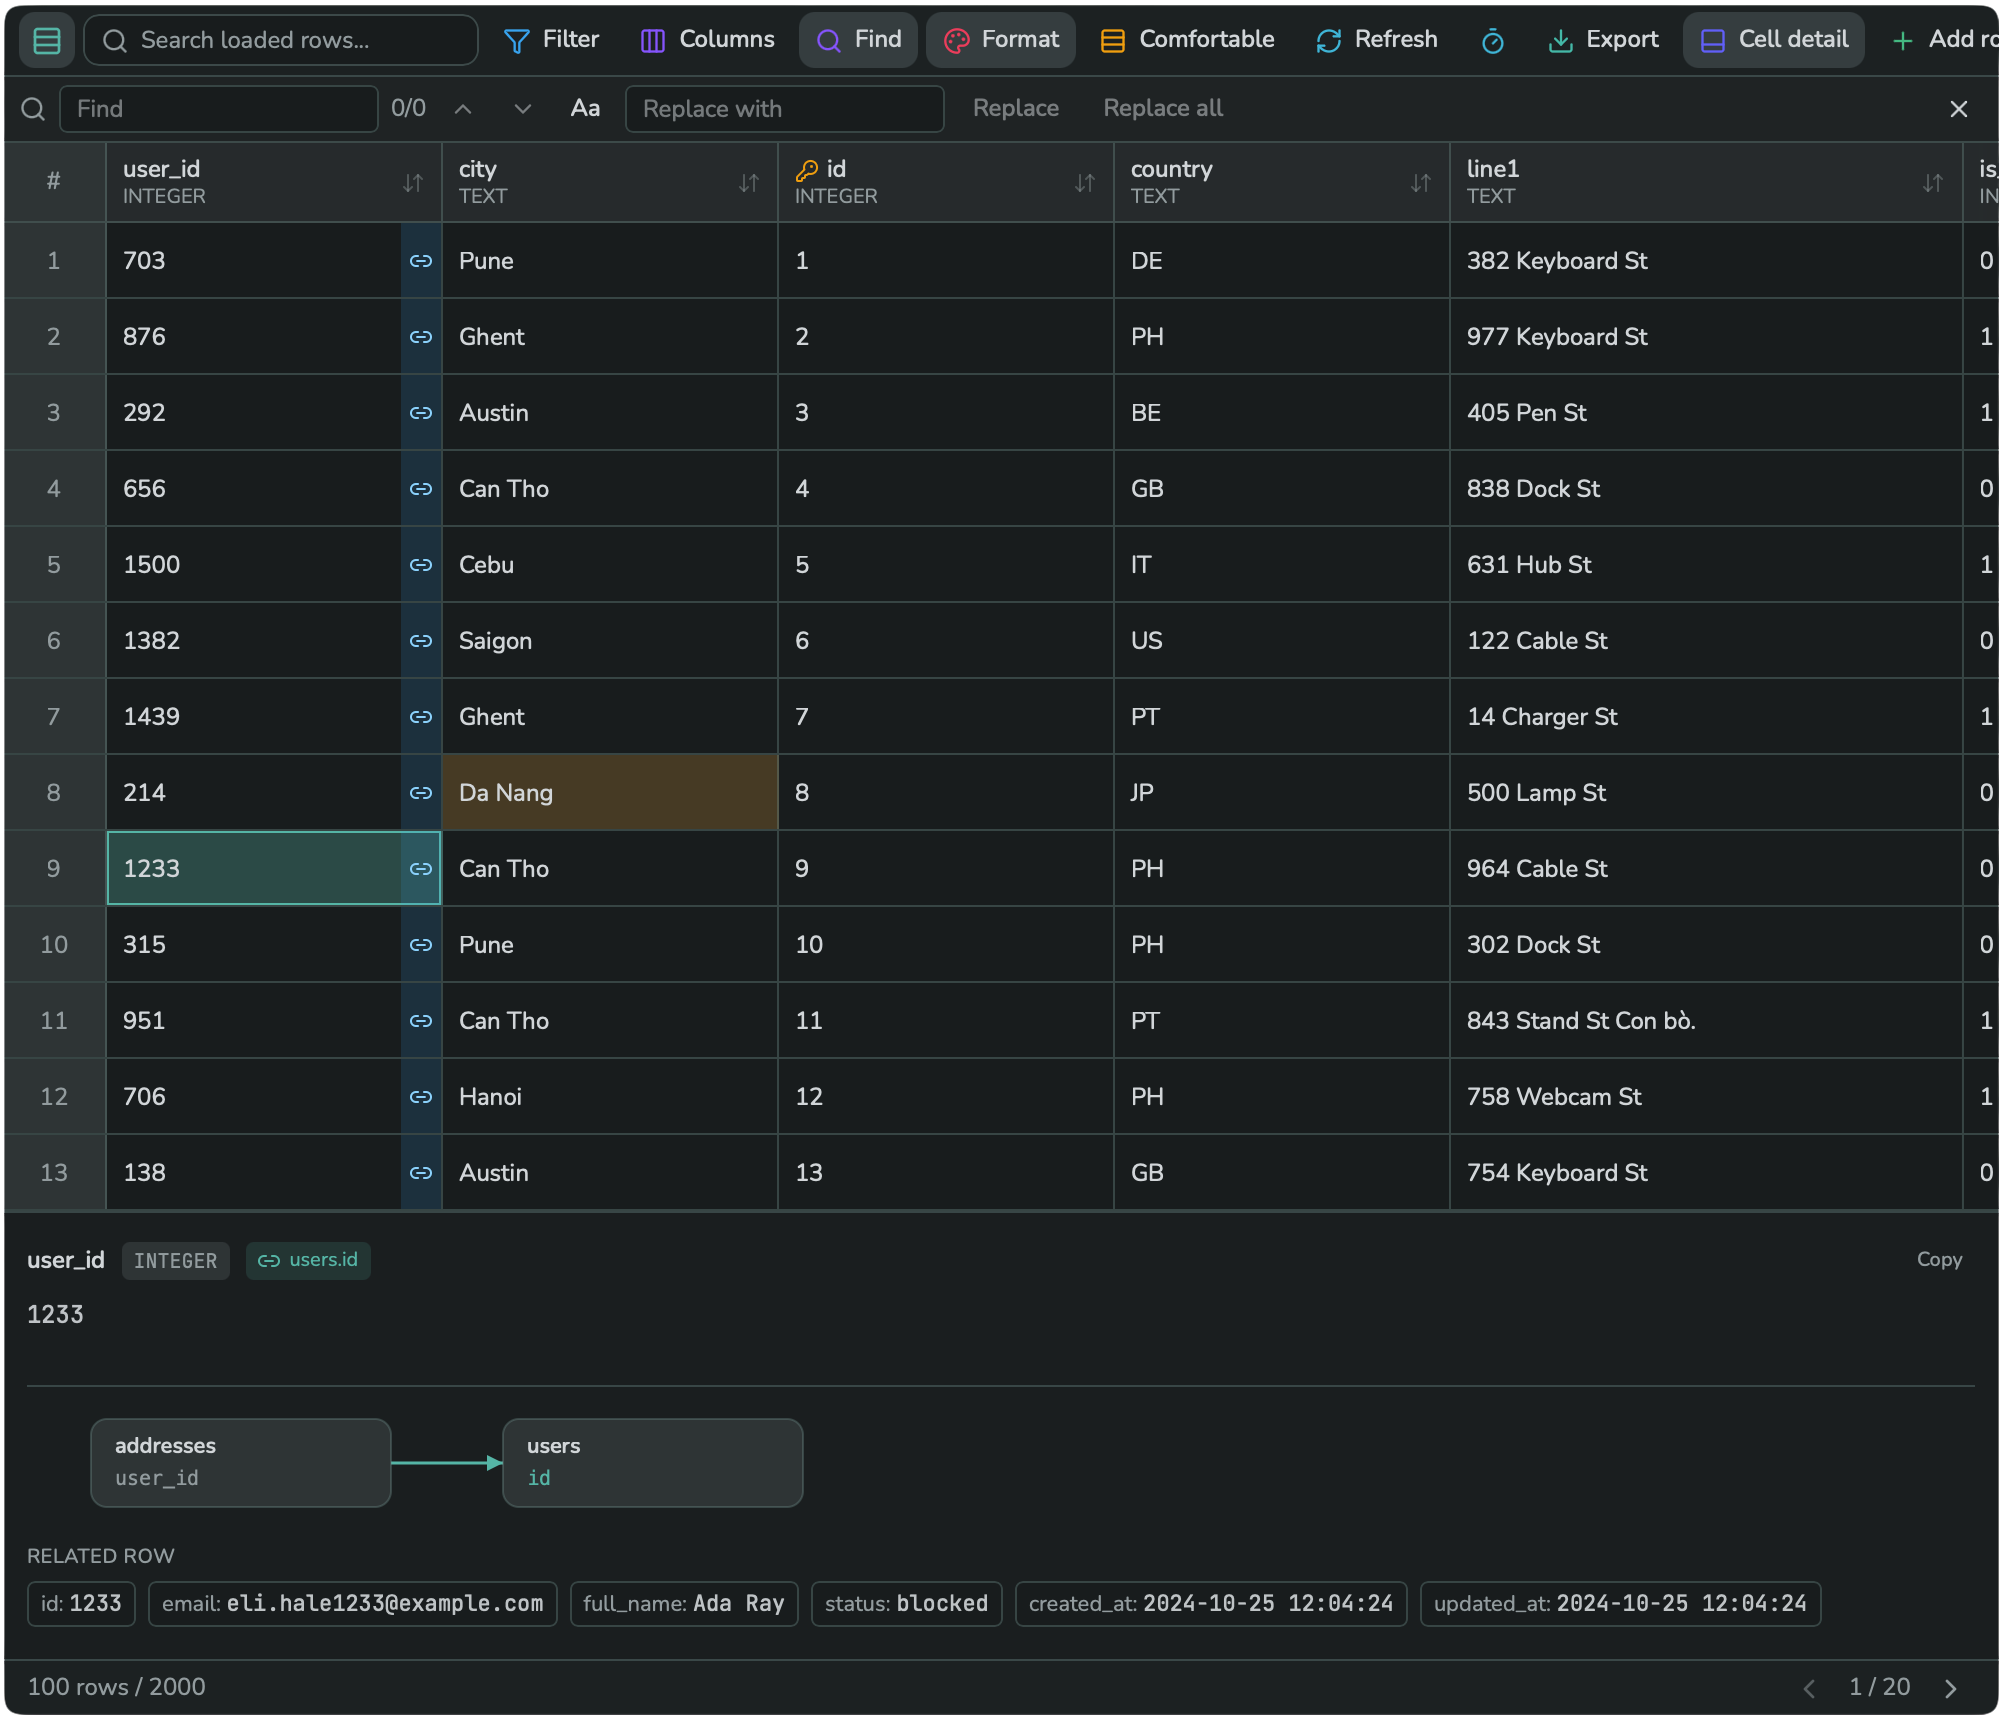
The panel always shows the column name, its type, and the raw value. If the column is a foreign key, it also shows:
- A small relationship diagram (for example
addresses.user_id → users.id). - A Related row card with the linked row's own columns and values, fetched automatically.
This is useful both for reading a long or truncated value, and for quickly checking what a foreign key actually points to, without switching tabs.
8. Adding a row
Click + Add row to open the Add new row form:
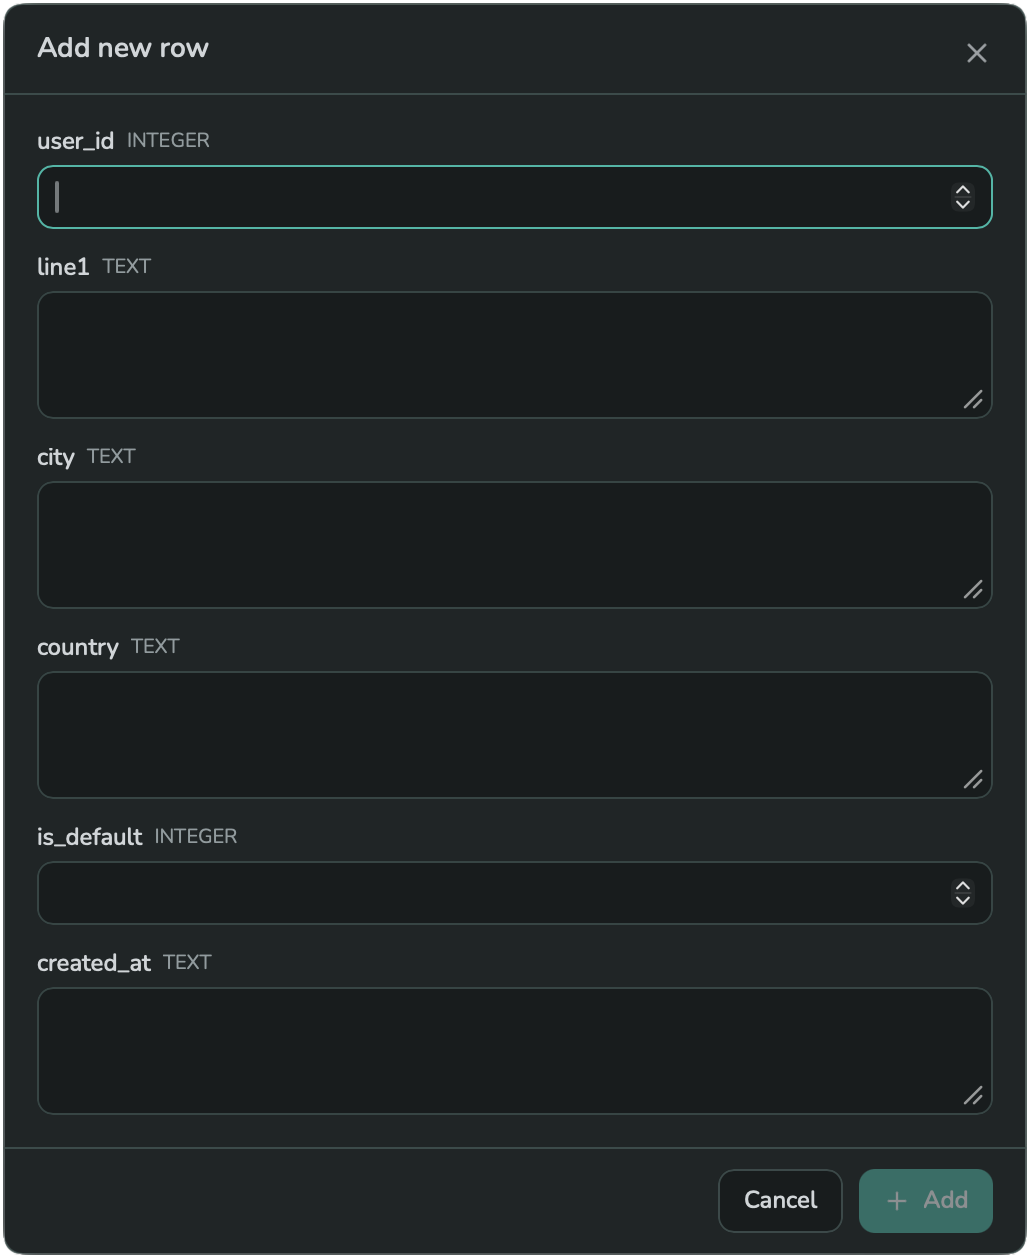
Fill in a value for each field (each one shows its column type). Auto-generated columns, such as an auto-increment primary key, are hidden automatically — the database fills them in for you. Click + Add to insert the row, or Cancel to discard it.
9. Selecting cells, columns, and rows
You can select a rectangular range of cells, whole columns, or whole rows. Each selection type has its own right-click menu.
Cell selection — drag across cells, then right-click:
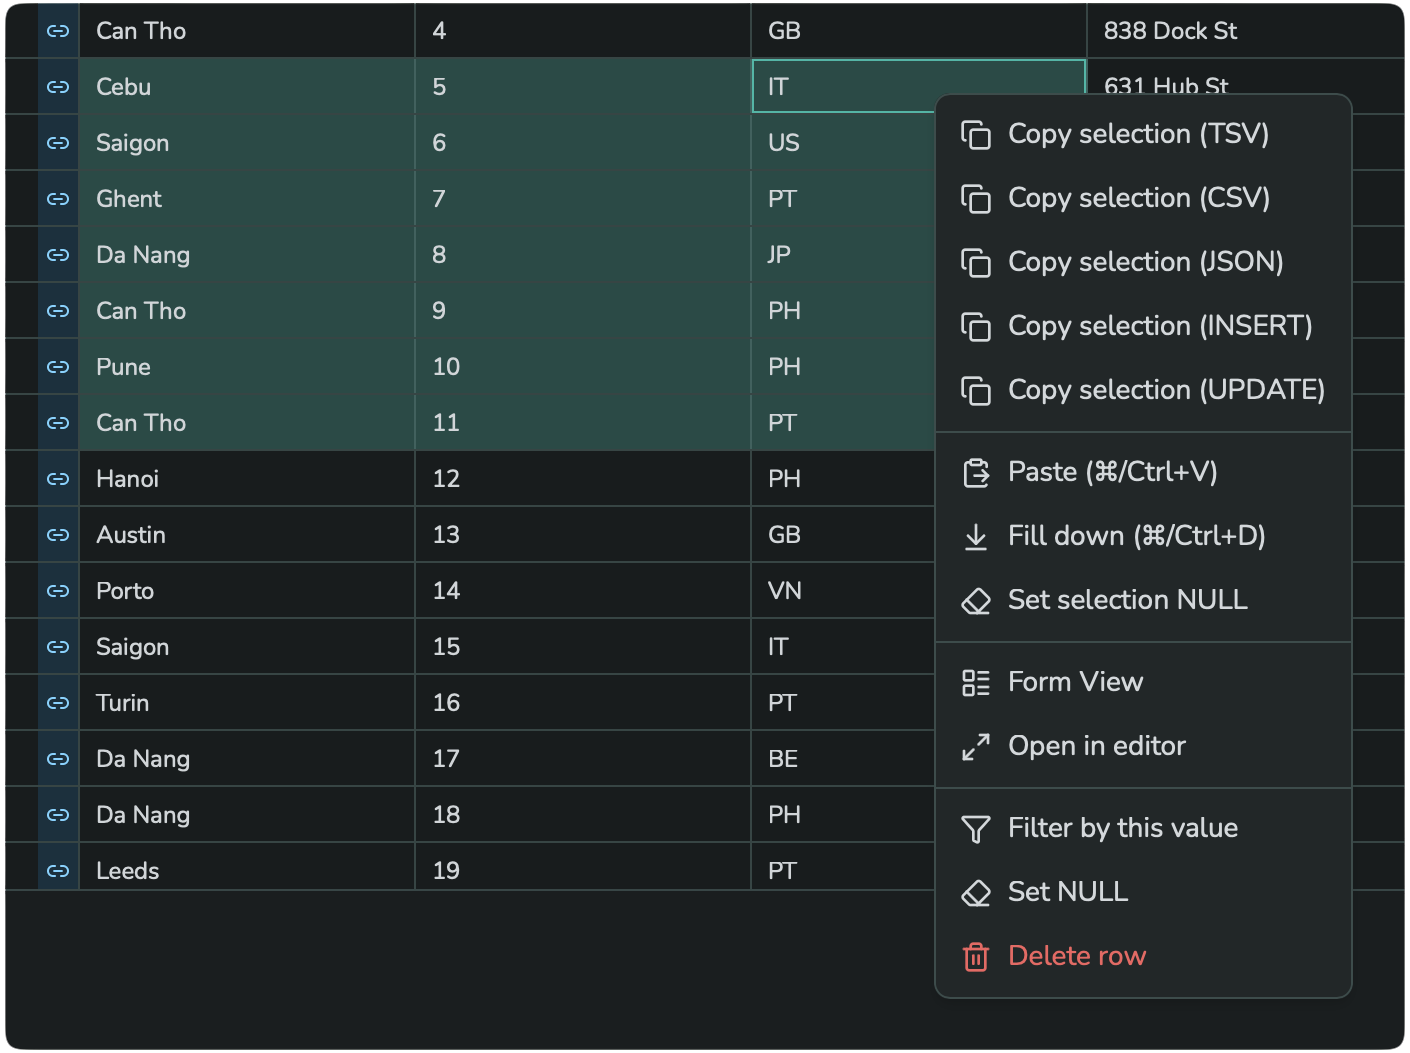
Menu items include: Copy selection as TSV, CSV, JSON, INSERT, or UPDATE; Paste (⌘/Ctrl+V); Fill down (⌘/Ctrl+D); Set selection NULL; Form View; Open in editor; Filter by this value; Set NULL; Delete row. The status bar also shows quick statistics for the selection (count, sum, average, min, max).
Column selection — click column headers:
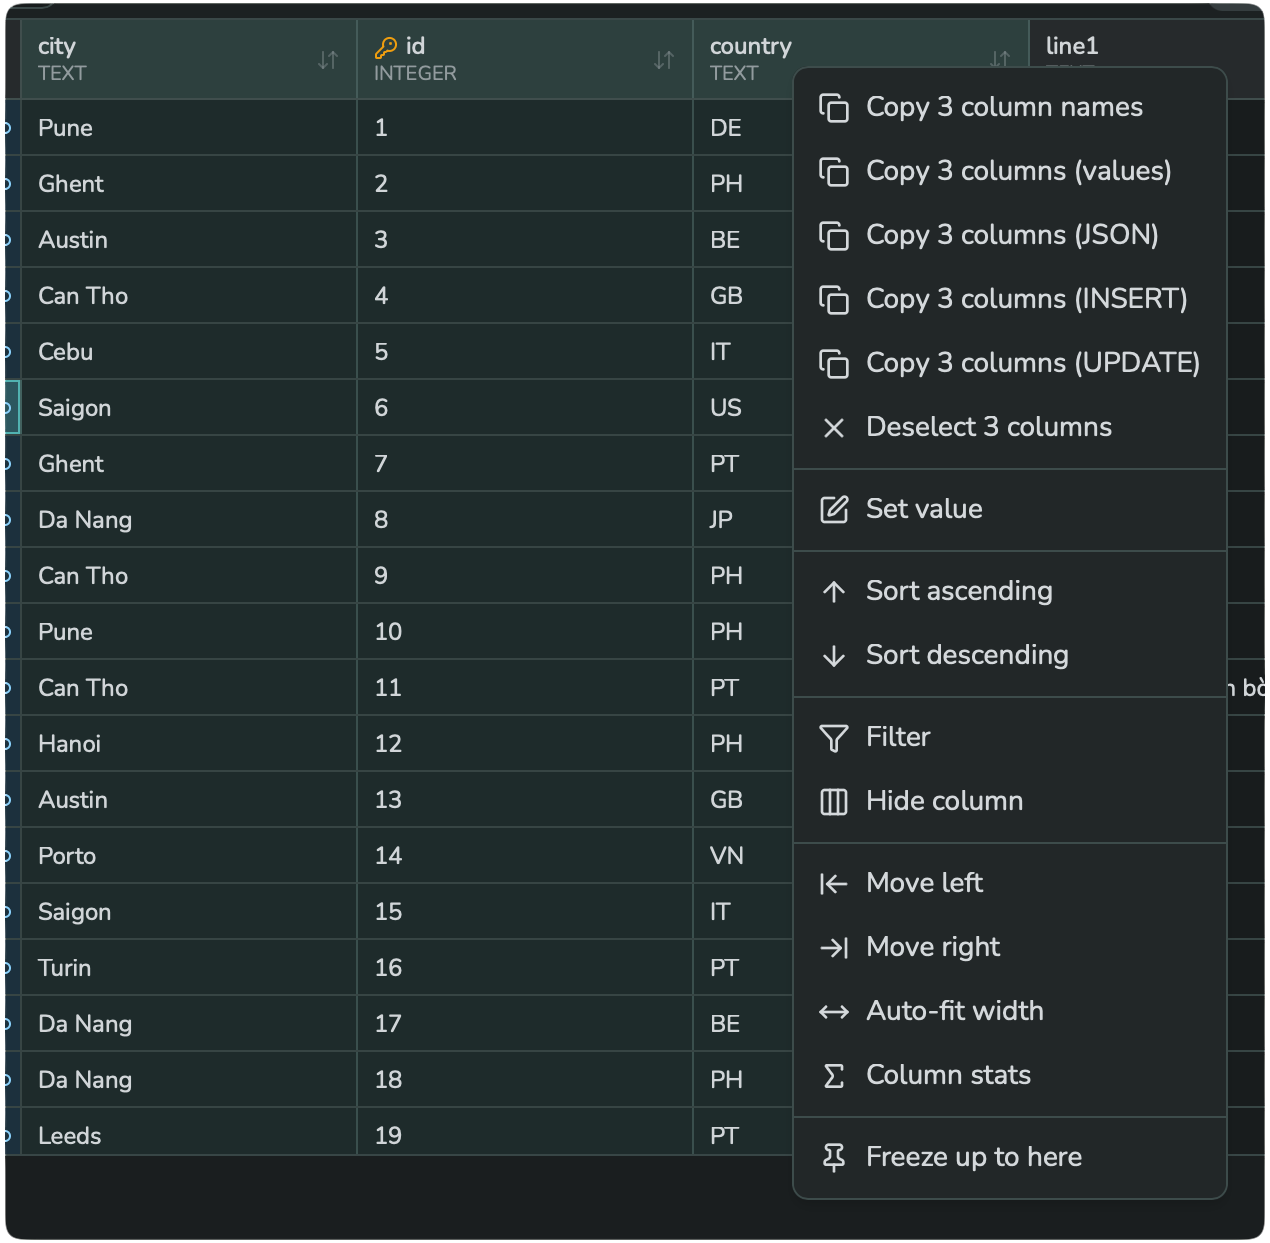
Menu items include: copy column names/values/JSON/INSERT/UPDATE; Deselect columns; Set value; Sort ascending/descending; Filter; Hide column; Move left/right; Auto-fit width; Column stats; Freeze up to here.
Row selection — click row numbers:
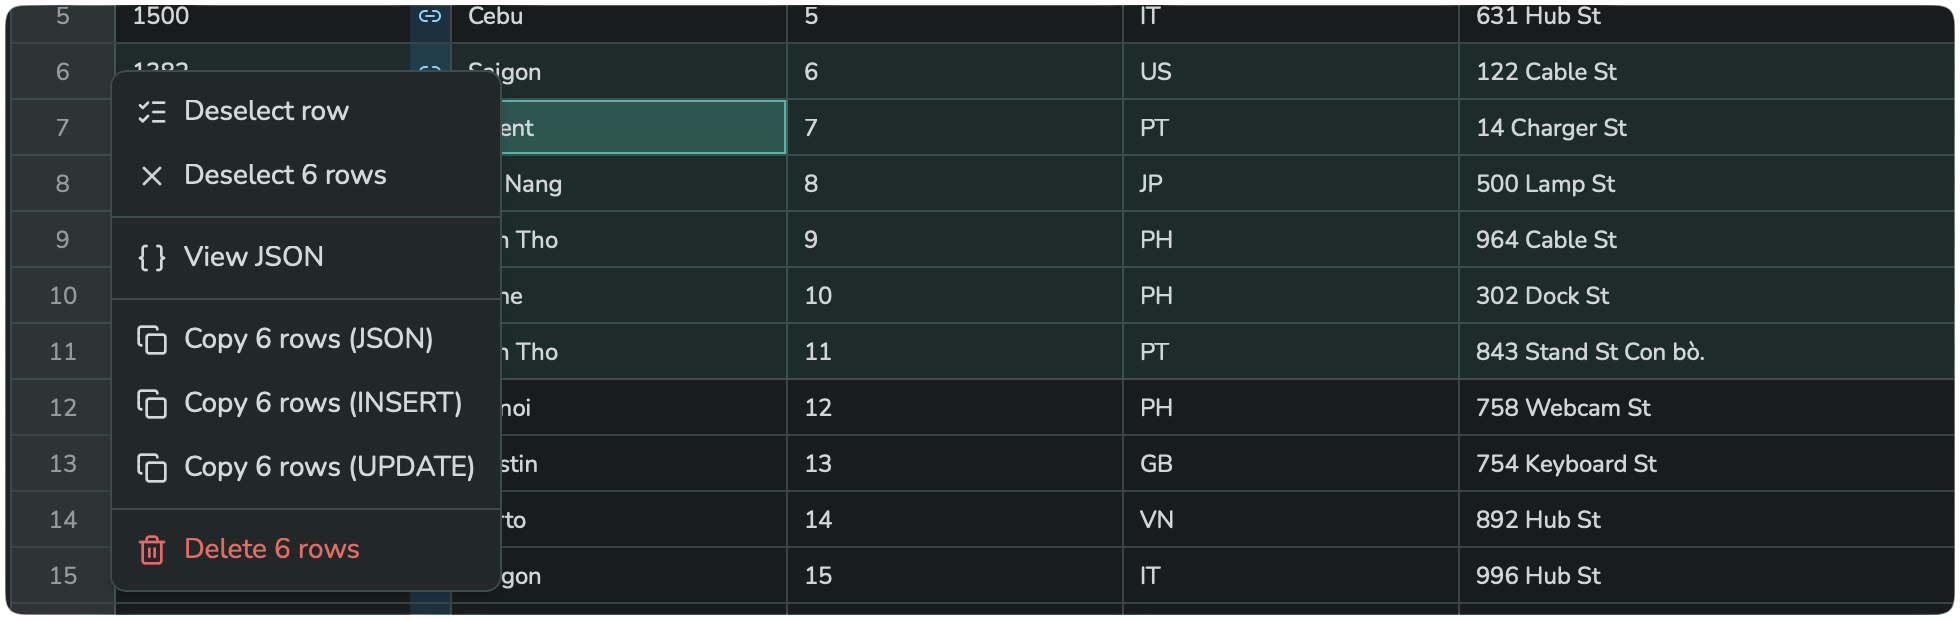
Menu items include: Deselect row(s); View JSON (see section 13); copy as JSON/INSERT/UPDATE; Delete rows.
10. Paging
Large tables load one page at a time. Two controls at the bottom of the grid manage this:
Rows per page — click the row-count text (bottom-left) to choose a page size:
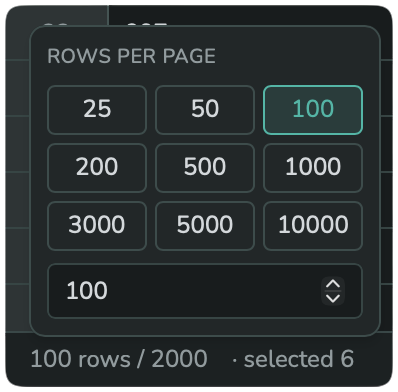
Presets: 25, 50, 100, 200, 500, 1000, 3000, 5000, 10000. You can also type a custom size, up to 10000.
Go to page — click the page indicator (bottom-right) to jump directly to a page number, or use First / Last:
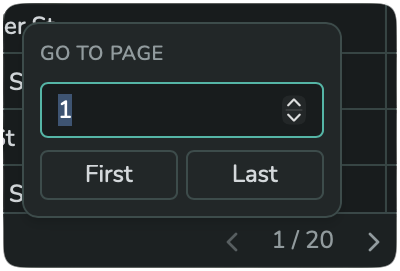
Changing pages clears any active cell/row/column selection, since the selected indexes would otherwise point to different data on the new page.
11. Row mode vs. cell mode editing
The grid has two editing modes, switched with one toggle button in the toolbar:
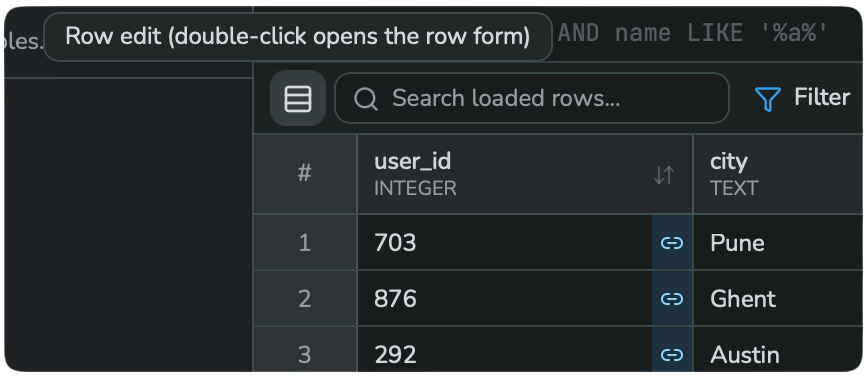
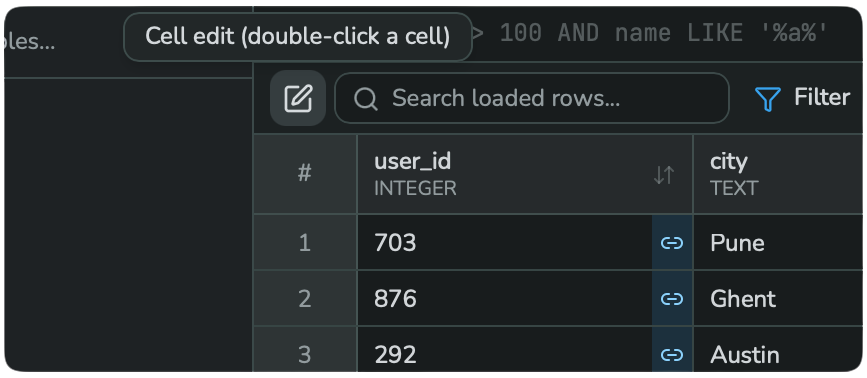
- Row mode — double-clicking any row opens the whole row as an editable form (see section 12).
- Cell mode — double-clicking a single cell opens a small form with just that one field.
Click the toggle button to switch between them at any time.
12. Editing a row or a cell
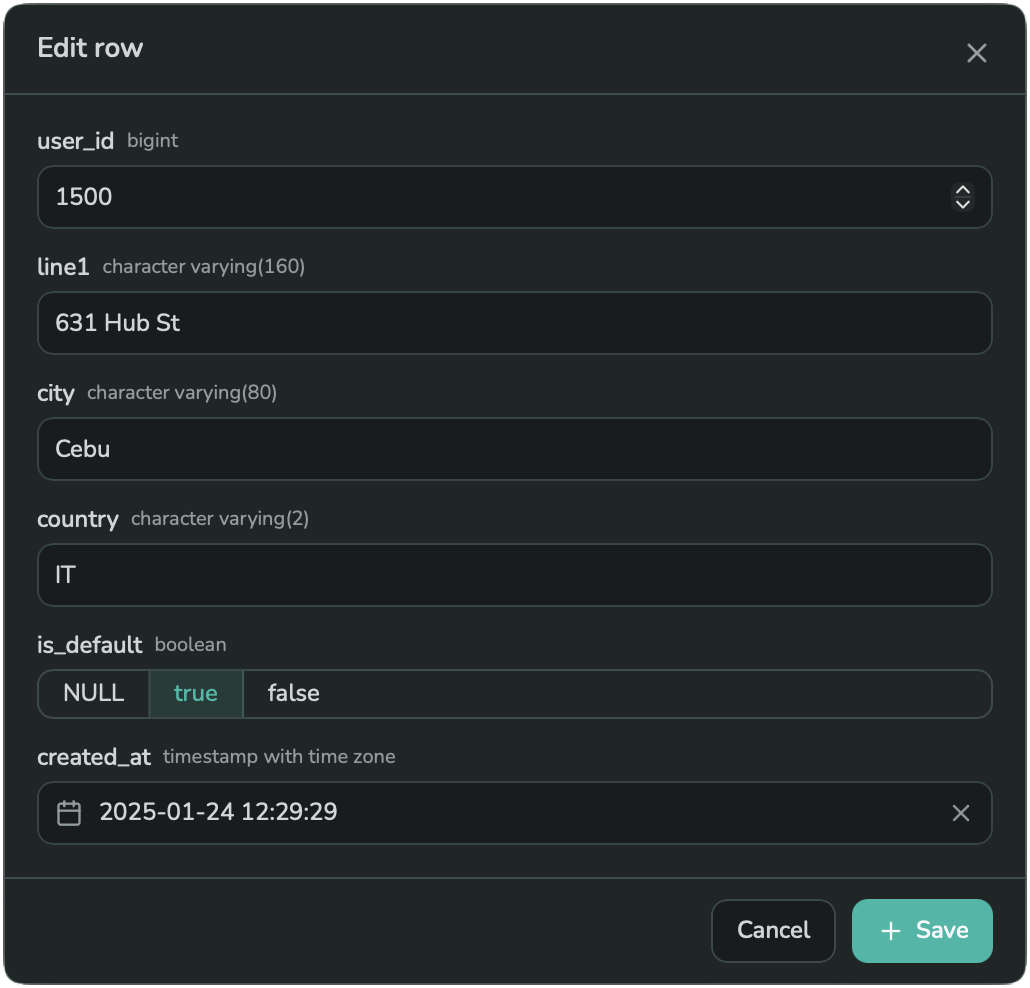
In row mode, double-clicking a row opens Edit row, a form with one labeled field per column, each showing its data type:
In cell mode, double-clicking a single cell opens the same dialog restricted to just that column:
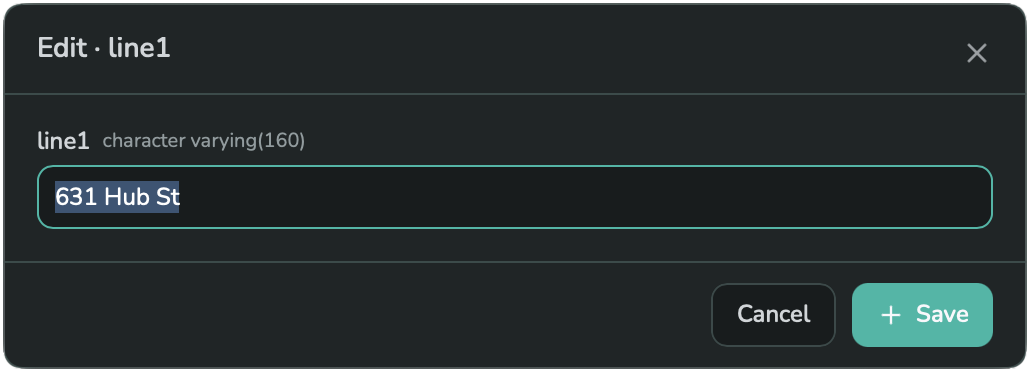
Click Save to apply your changes, or Cancel to discard them. JiveDB only writes the fields you actually changed, as a single update keyed by the row's primary key — this means a table needs a primary key before you can edit its rows.
13. In-line editing
In addition to modal editing (row mode and cell mode above), you can edit cells directly on the table grid without opening a dialog. Navigate between cells and press Enter to start editing. Once you finish typing a value and press Enter again, the cell enters a "pending" state — marked with a highlight so you always know which changes have not been saved yet:
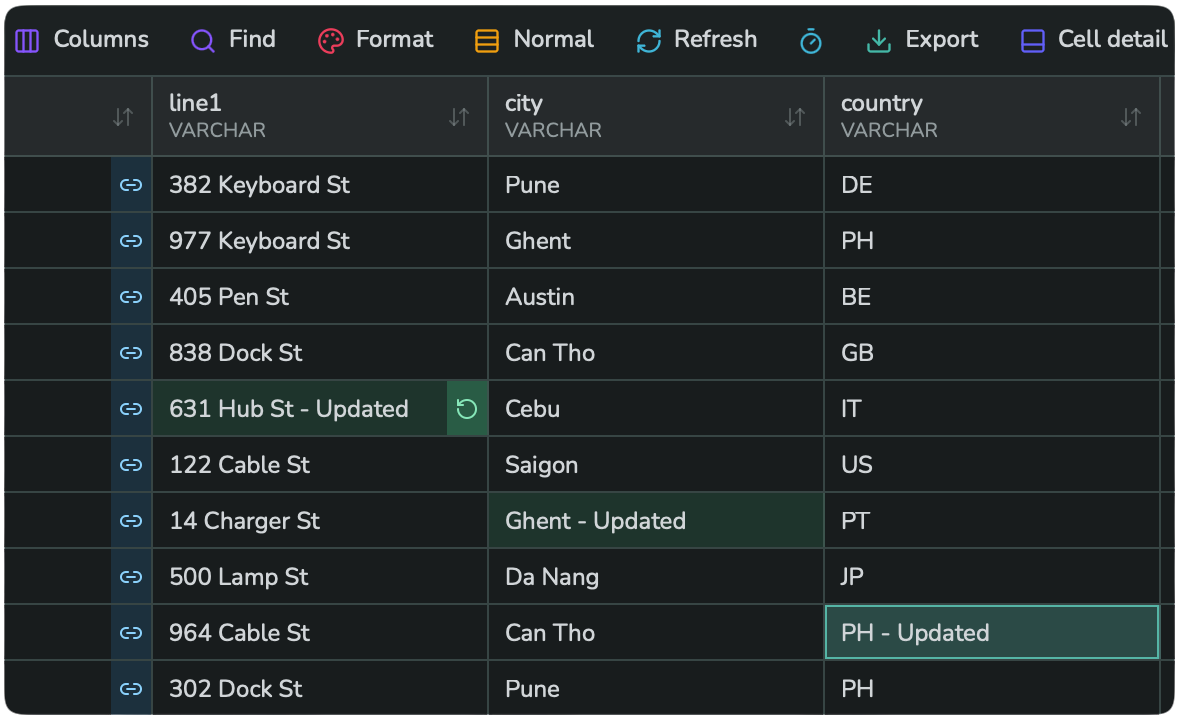
You can edit as many cells as you want. Once you're done making changes, press Cmd+Enter (or Ctrl+Enter on Windows/Linux) to save all pending edits at once. This in-line editing mode makes it quick to make bulk changes directly in the table without opening dialogs.
14. Viewing a row as JSON, with foreign keys expanded
Select one or more rows, right-click, and choose View JSON to open the JSON Viewer:
In the JSON Viewer:
- Every foreign-key value has a small download icon next to it. Click it to fetch the related row and expand it inline, right in place of the plain value — and you can keep expanding: if that related row also has a foreign key, click its icon too, to any depth.
- Click the × next to any field to remove it from the JSON before copying.
- Click Copy JSON to copy the (possibly expanded, possibly trimmed) result to your clipboard — ready to paste anywhere, including back into a query tab.
If you selected multiple rows, the JSON Viewer shows an array of row objects, and you can expand or trim each row's fields independently.